Table of Contents
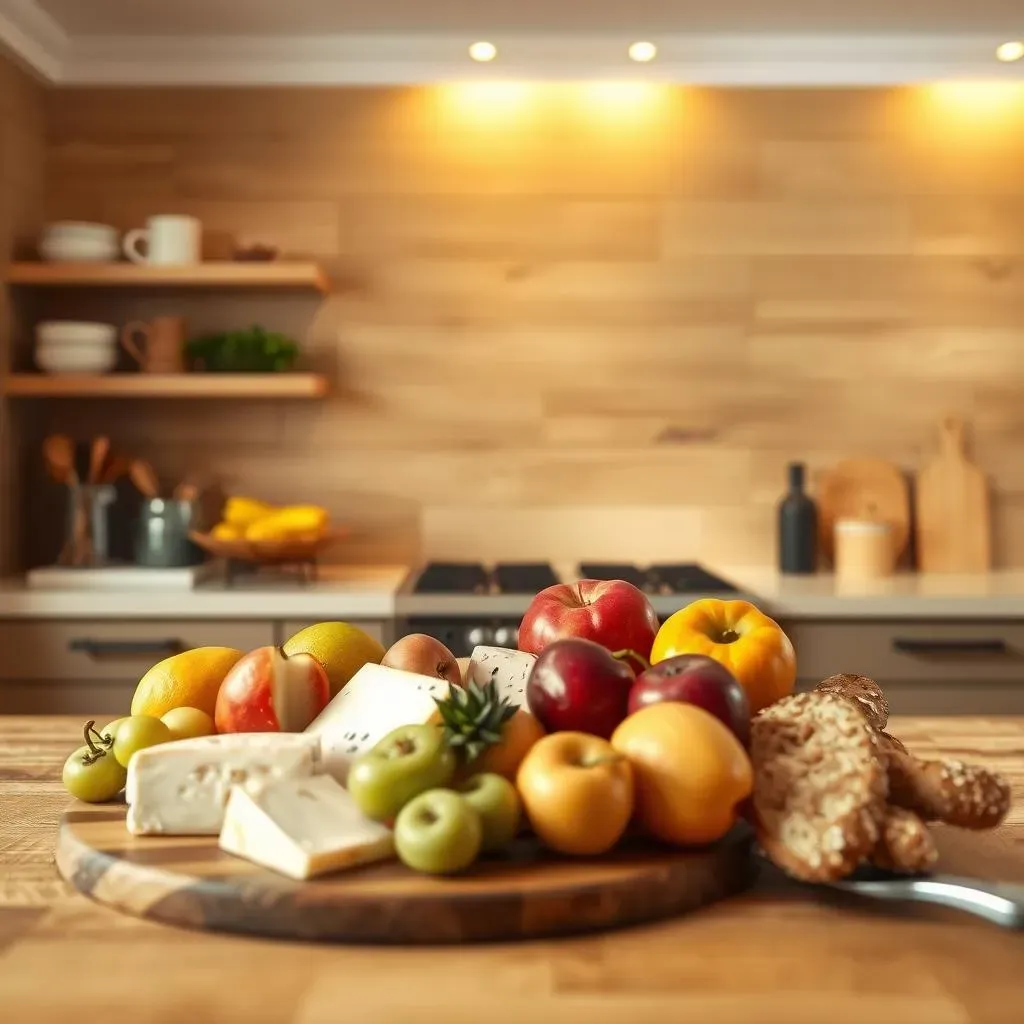
Is your kitchen feeling a little…blah? Maybe it's time for a change, and not the kind that involves a full remodel. I'm talking about something simpler, yet incredibly impactful: a wood accent wall in the kitchen. Yes, you heard right. Forget boring, painted walls. We're bringing texture, warmth, and a whole lot of style to the heart of your home. This isn't just about slapping some wood on a wall; it's about creating a focal point, a conversation starter, and a space that truly feels like *you*. Ready to ditch the drab and embrace the fab? This article will guide you through why a wood accent wall in kitchen is a game-changer. We'll explore different styles, from rustic shiplap to sleek, modern designs. I will also give you some practical DIY tips, and how to keep your new kitchen feature looking fantastic for years to come. So, grab a coffee, get comfortable, and let's transform your kitchen together, one plank at a time.
Why a Wood Accent Wall in Your Kitchen?
Why a Wood Accent Wall in Your Kitchen?
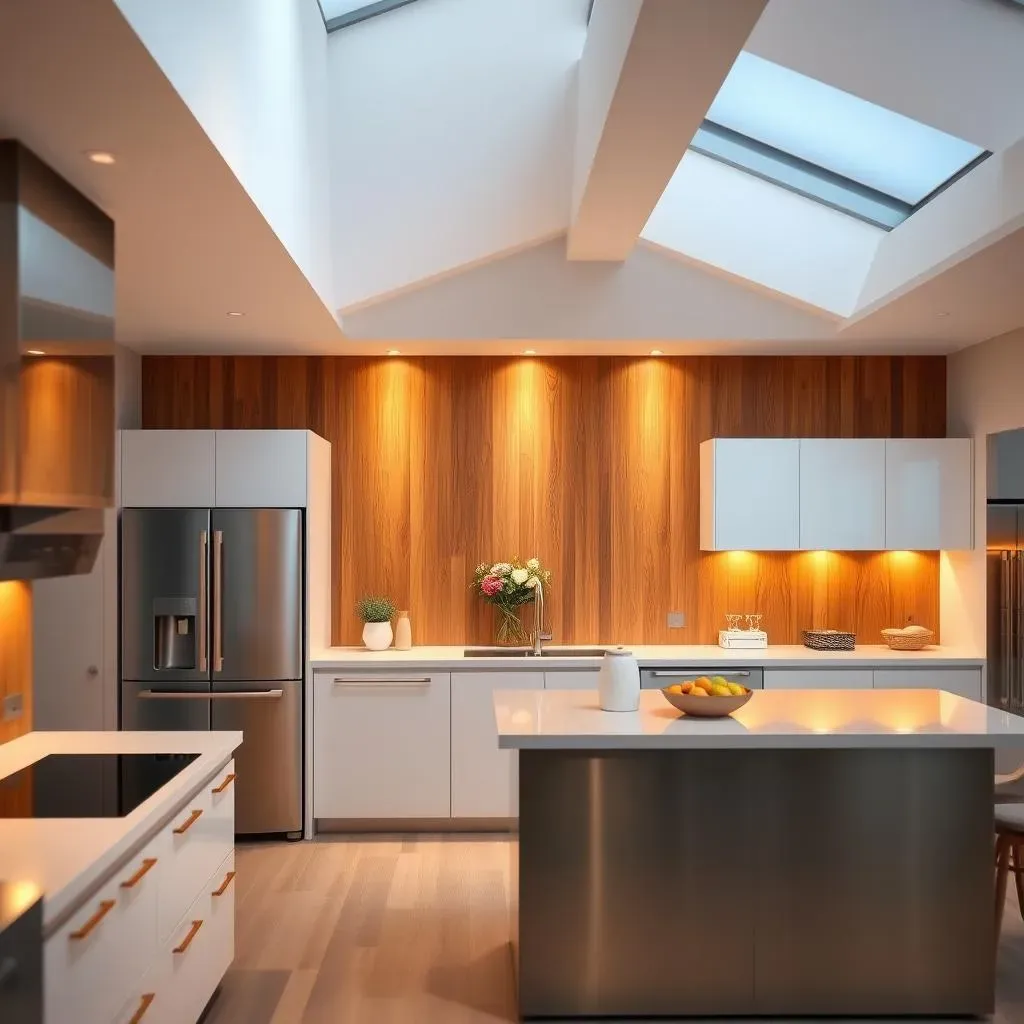
The Visual Appeal: More Than Just a Pretty Face
Let's be honest, a plain wall is just that – plain. But a wood accent wall? It's like adding a piece of art to your kitchen. It instantly elevates the space, giving it character and depth that paint alone just can't achieve. Think about it: the natural grain, the warm tones, the tactile texture – it all combines to create a visually stunning focal point. It’s not just about aesthetics; it's about transforming the entire feel of your kitchen. My own kitchen was so blah before, now, with the wood accent wall, it feels like a totally different room.
It's like the kitchen got a major personality upgrade. And the best part? It's incredibly versatile. Whether your style is rustic farmhouse, modern minimalist, or something in between, there's a wood accent wall design that'll fit right in. I’ve seen kitchens with reclaimed wood that look like they belong in a cozy cabin, and others with sleek, dark wood that scream contemporary chic. The possibilities are endless, really. So, if you’re looking for a way to add some serious visual interest, this is it.
The Practical Perks: It's Not Just About Looks
so they look amazing, but wood accent walls aren't just about eye candy; they can actually be quite practical. For starters, they're great at hiding imperfections. Got a wall that's a bit wonky? Wood panels can cover that right up, no problem. Plus, they can add a layer of insulation, which might help with temperature control and noise reduction. I mean, who wouldn’t want a slightly quieter kitchen when you are cooking a big meal? It’s like a secret bonus that comes with looking good.
And let's not forget about durability. A good wood accent wall can withstand a lot of wear and tear, making it a great option for a high-traffic area like the kitchen. It's far more resistant to scuffs and marks than paint, which means less touch-ups and more time enjoying your space. Trust me, as someone who's constantly bumping into things, I appreciate this benefit more than I can say. It's a beautiful and tough upgrade for your kitchen.
Benefit | Description |
|---|---|
Visual Appeal | Adds depth, character, and a focal point to the kitchen. |
Versatility | Fits various styles, from rustic to modern. |
Hides Imperfections | Covers up uneven walls and other flaws. |
Insulation | Provides a layer of insulation for temperature and noise control. |
Durability | Resistant to scuffs and marks, ideal for high-traffic areas. |
Different Styles of Wood Accent Walls for Kitchens
Different Styles of Wood Accent Walls for Kitchens
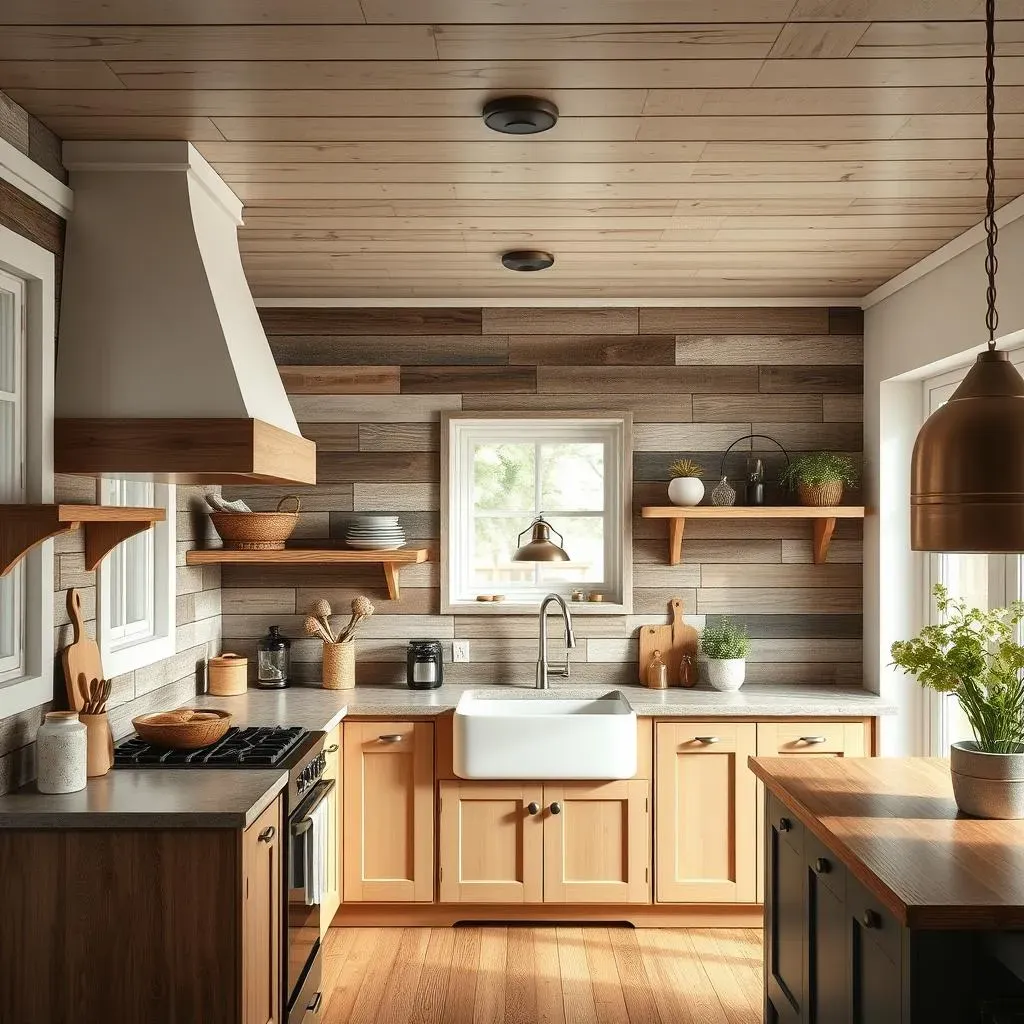
Shiplap: The Coastal Classic
let's talk shiplap. It's been having a moment, and honestly, I'm not mad about it. This style, with its horizontal planks and subtle grooves, brings a relaxed, coastal vibe to any kitchen. It's like a breath of fresh sea air, even if you live nowhere near the ocean. The clean lines of shiplap make a space feel larger and brighter, and they’re just so versatile. You can paint it any color you want, or leave it natural for a more rustic feel. I've seen it in everything from bright white kitchens to cozy, farmhouse-style spaces, and it always looks amazing. It's a classic for a reason – it just works.
What I appreciate most about shiplap is its simplicity. It's not fussy, it's not overly complicated, it just adds a touch of understated elegance. Plus, it's relatively easy to install, even for someone like me, who's not exactly a DIY pro. I remember the first time I saw it in a kitchen; I was immediately hooked. It’s like the perfect mix of casual and chic, and it's a style that never seems to get old. If you’re aiming for a timeless look, shiplap is definitely a great way to go.
Reclaimed Wood: Rustic Charm
Now, if you're going for something with a bit more character, reclaimed wood is where it's at. This isn't your run-of-the-mill lumber; it's wood that's been salvaged from old barns, factories, and other structures. It comes with its own history, its own story etched into every knot and grain. Using reclaimed wood for a kitchen accent wall creates a warm, inviting space that feels both unique and lived-in. I love how each piece is slightly different, which gives the wall an organic, almost imperfect, beauty. It’s like bringing a piece of the past into your present.
The beauty of reclaimed wood is that it adds instant texture and depth. It’s not just a wall; it’s a statement. It can range from light and weathered to dark and dramatic, depending on the type of wood and its history. I once saw a kitchen with a reclaimed wood wall that looked like it had been there for centuries, it had so much personality. It's a fantastic way to add some rustic charm, especially if you’re into a more industrial or farmhouse aesthetic. Plus, it's a sustainable option, which is always a plus. It's like giving old wood a new, beautiful life, and you get a stunning accent wall in return.
Style | Description | Vibe |
|---|---|---|
Shiplap | Horizontal planks with subtle grooves. | Relaxed, coastal, bright |
Reclaimed Wood | Salvaged wood with unique knots and grains. | Rustic, warm, historical |
DIY Tips for Installing a Wood Accent Wall in Your Kitchen
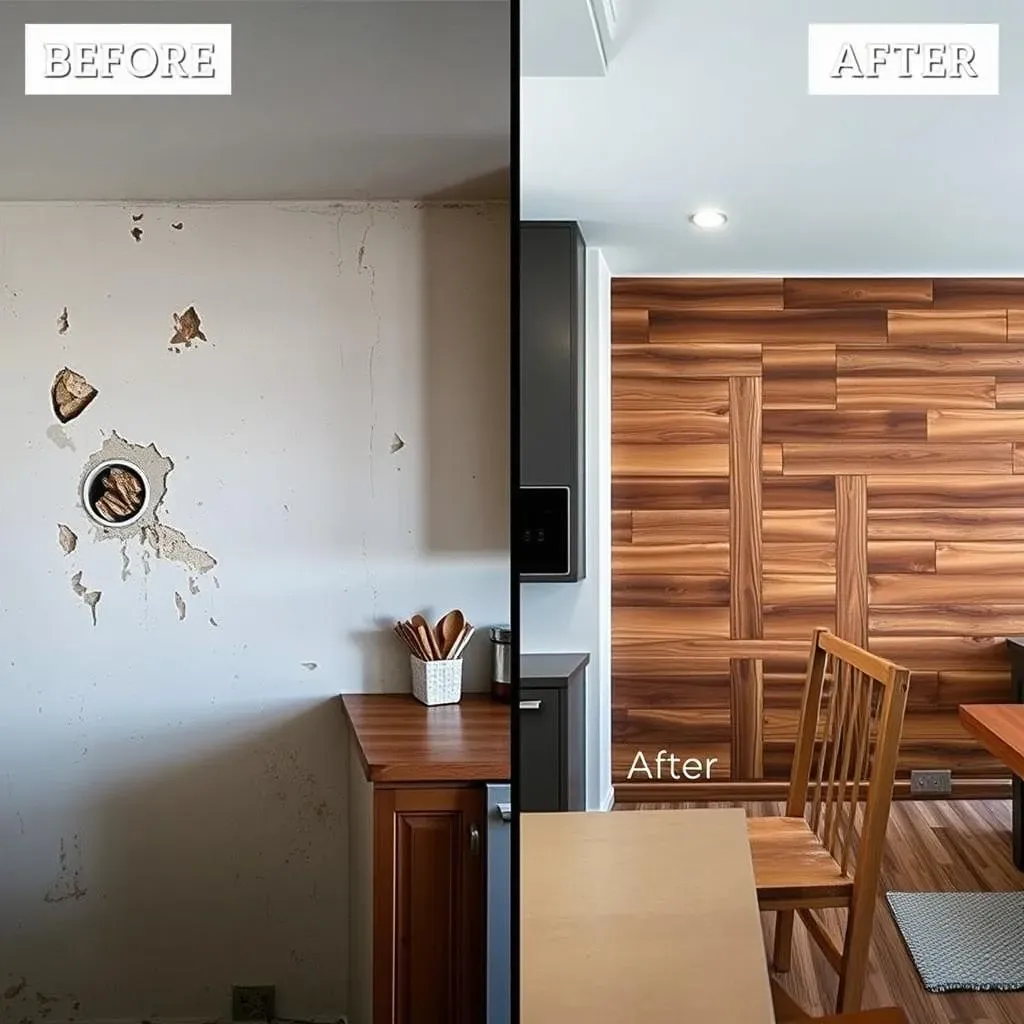
DIY Tips for Installing a Wood Accent Wall in Your Kitchen
Prep Work: Setting the Stage for Success
so you're ready to get your hands dirty? Awesome! But before you start nailing boards to the wall, let's talk prep work. This is where the magic really happens, or where things can go horribly wrong if you skip it. First things first: you need to make sure your wall is clean and smooth. Grab a damp cloth and wipe down any dust, grime, or old cobwebs. Next, check for any uneven spots. If you've got any major bumps or holes, you might want to patch them up with some spackle. You don't want your wood planks looking like they're riding a rollercoaster. And finally, measure, measure, measure! Use a level and a measuring tape to mark where your first row of planks will go. Accuracy is key here, folks. I once eyeballed a project, and let's just say, it didn't end well. So, take your time and get it right from the start.
Another crucial step is deciding on your layout and how you want to arrange the wood pieces. Will you go for a straight, even pattern, or something more staggered? Do you want vertical or horizontal planks? This is a good time to play around with your design and make sure you have all the materials you need. It’s like planning a puzzle; you need all the pieces before you start putting them together. And while you’re at it, make sure you have all the tools you need: a saw, a level, a nail gun or hammer, and some construction adhesive. I can't tell you how many times I've been in the middle of a project, only to realize I'm missing a crucial tool. Avoid that pain by preparing everything beforehand. It’s all about setting yourself up for success, and a little prep goes a long way.
Installation: Bringing Your Vision to Life
Alright, the wall is prepped, the materials are ready, and you're itching to get started. Now, it's time for the fun part: installation. If you're using construction adhesive, apply it to the back of each plank before pressing it firmly against the wall. Make sure you’re following the lines you marked earlier. If you’re using nails, secure each plank using a nail gun or hammer, making sure not to overdo it. You don't want to crack the wood or leave unsightly nail heads sticking out. I found that using a level every few planks helps keep things straight. It’s like checking your work as you go, ensuring that you’re on the right track. And don't worry if things aren't perfectly aligned at first. You can always make adjustments as you go.
As you move up the wall, you might need to cut some pieces to fit around outlets or corners. A good jigsaw or miter saw will come in handy here. Always measure twice and cut once, or you might end up with pieces that are too short. Trust me, I have a graveyard of miscut wood in my garage. Once all your pieces are in place, give them a final look-over. Make sure everything is securely attached and aligned. If you’re happy with the result, you can start on the finishing touches. This can be anything from adding some caulk to fill in gaps to applying a sealant for added protection. It’s like putting the final touches on a painting. And just like that, you’ve got yourself a beautiful wood accent wall. It's such a rewarding feeling when you see it all come together.
Step | Description |
|---|---|
Prep Wall | Clean, smooth, and patch any imperfections. Measure and mark starting point. |
Plan Layout | Decide on the pattern and arrange the wood pieces. Gather necessary tools. |
Install Planks | Apply adhesive or nails, using a level to maintain straight lines. |
Cut Pieces | Measure twice, cut once, and use jigsaw or miter saw as needed. |
Finishing Touches | Caulk gaps and apply sealant for protection. |
Maintaining and Caring for Your Kitchen Wood Accent Wall

Maintaining and Caring for Your Kitchen Wood Accent Wall
Regular Cleaning: Keeping it Fresh
so you've got this amazing wood accent wall in your kitchen, and now you're wondering how to keep it looking its best, right? Well, the good news is, it's not as high-maintenance as you might think. Regular cleaning is key. For most wood accent walls, a simple dusting or a light wipe-down with a soft, damp cloth is all you need. Avoid using harsh chemicals or abrasive cleaners, as these can damage the wood's finish. I like to use a microfiber cloth, it's soft and it picks up dust really well. Think of it like a gentle spa day for your wall, keeping it fresh and clean without causing any harm.
If you do encounter any spills or splatters, tackle them as soon as possible. The longer they sit, the harder they'll be to remove. I once had a tomato sauce incident that I didn't clean up right away, and let's just say, it took some serious elbow grease to get it off. So, learn from my mistakes and clean up any messes promptly. And remember, less is often more when it comes to cleaning wood. You don't need to soak the wall; a light touch is all that's needed. Regular, gentle cleaning will help keep your wood accent wall looking great for years to come.
Dealing with Scratches and Wear
No matter how careful you are, scratches and wear are bound to happen, especially in a busy kitchen. But don't worry, it doesn't mean your wood accent wall is ruined. For minor scratches, you can often use a wood touch-up marker or a stain pen that matches your wood's color. These are like magic wands for wood, they can make small imperfections disappear pretty quickly. I have a whole arsenal of these in my toolbox, and they've saved the day more times than I can count. Just make sure you test the marker or pen on a small, inconspicuous area first to ensure it's the right color.
For deeper scratches or more significant wear, you might need to do a little more work. Lightly sanding the affected area and then applying a matching stain or finish can help blend the damage with the rest of the wall. However, if you're not comfortable doing this yourself, you can always call in a professional. I learned the hard way that sometimes it’s best to leave certain things to the experts. But most of the time, a little touch-up here and there is all it takes to keep your wood accent wall looking its best. It's all about being proactive and addressing any issues as they arise. That way, you can enjoy your beautiful wall for a long time without worrying too much about wear and tear.
Issue | Solution |
|---|---|
Dust and Dirt | Dust regularly with a microfiber cloth. Wipe gently with a damp cloth if needed. |
Spills and Splatters | Clean up immediately with a damp cloth. Avoid harsh chemicals. |
Minor Scratches | Use a wood touch-up marker or stain pen. |
Deeper Scratches or Wear | Lightly sand and apply a matching stain or finish. Consult a professional if needed. |
Preventative Measures: Keeping it Protected
Beyond regular cleaning and touch-ups, there are some preventative measures you can take to protect your wood accent wall. If your wall is located near a sink or stovetop, consider applying a sealant or varnish to provide an extra layer of protection against moisture and grease. This is especially important for untreated wood, as it's more susceptible to damage. I learned this the hard way when some water splashed on my wall and left a mark. Now I make sure to seal any wood that might be exposed to moisture. It’s like giving your wall a raincoat, keeping it dry and protected.
Also, try to avoid placing anything too hot directly against the wall. Heat can cause the wood to warp or discolor over time. And, if you have kids or pets, be mindful of any potential sources of damage. I've seen some interesting "artwork" appear on my walls, and it's not always the kind I want to keep. By taking these simple precautions, you can help ensure that your wood accent wall remains a beautiful focal point in your kitchen for many years. It's all about being proactive and taking a little extra care to keep it protected. After all, a little prevention is worth a lot of cure.
Wrapping Up Your Wood Accent Wall Journey
So, there you have it! We've explored the wonderful world of wood accent walls in the kitchen. From understanding why they're such a fantastic addition to your home, to navigating the different styles available, and even getting your hands dirty with some DIY tips, you're now equipped to transform your kitchen. Remember, this isn't just about following trends; it's about creating a space that reflects your unique taste and personality. A well-executed wood accent wall can add warmth, character, and a touch of the unexpected to your kitchen. Now, go ahead, get creative, and make your kitchen a place you truly love to be. And don't forget to share your masterpiece with me!