Table of Contents
Tired of staring at the same old boring bedroom walls? I get it. It's time to shake things up and bring some personality into your space. That's where wood accent walls come in. Forget about plain paint, we're talking about adding texture, warmth, and a whole lot of style. This isn't your grandma's wood paneling, either. We are exploring modern, cool, and totally achievable designs to elevate your bedroom. In this article, we'll explore the world of wood accent wall ideas for bedroom, from the initial spark of inspiration to the final touches of installation. We'll look at why wood is such a great choice, what styles are trending, and how you can get that magazine-worthy look without breaking the bank. So, grab a cup of coffee and let's transform your bedroom into a cozy, stylish retreat you'll never want to leave. Ready to get started?
Why Choose Wood Accent Walls for Your Bedroom?

Why Choose Wood Accent Walls for Your Bedroom?
let's be real, why even bother with a wood accent wall? Well, first off, it's a total game-changer for your bedroom's vibe. Think about it: paint is flat, wallpaper can be a pain, but wood? Wood brings texture, depth, and a natural warmth that's hard to beat. It's like giving your room a big, cozy hug. Plus, wood is incredibly versatile. You can go rustic with reclaimed planks, modern with sleek, clean lines, or even a bit glam with geometric patterns. It’s not just a wall; it's a statement piece. And let's be honest, who doesn't want a bedroom that looks like it belongs in a magazine?
Benefit | Description |
|---|---|
Adds Warmth | Wood brings a cozy, inviting feel to any room. |
Enhances Texture | Creates visual interest and depth on a flat surface. |
Versatile Style | Suitable for rustic, modern, and many other decor styles. |
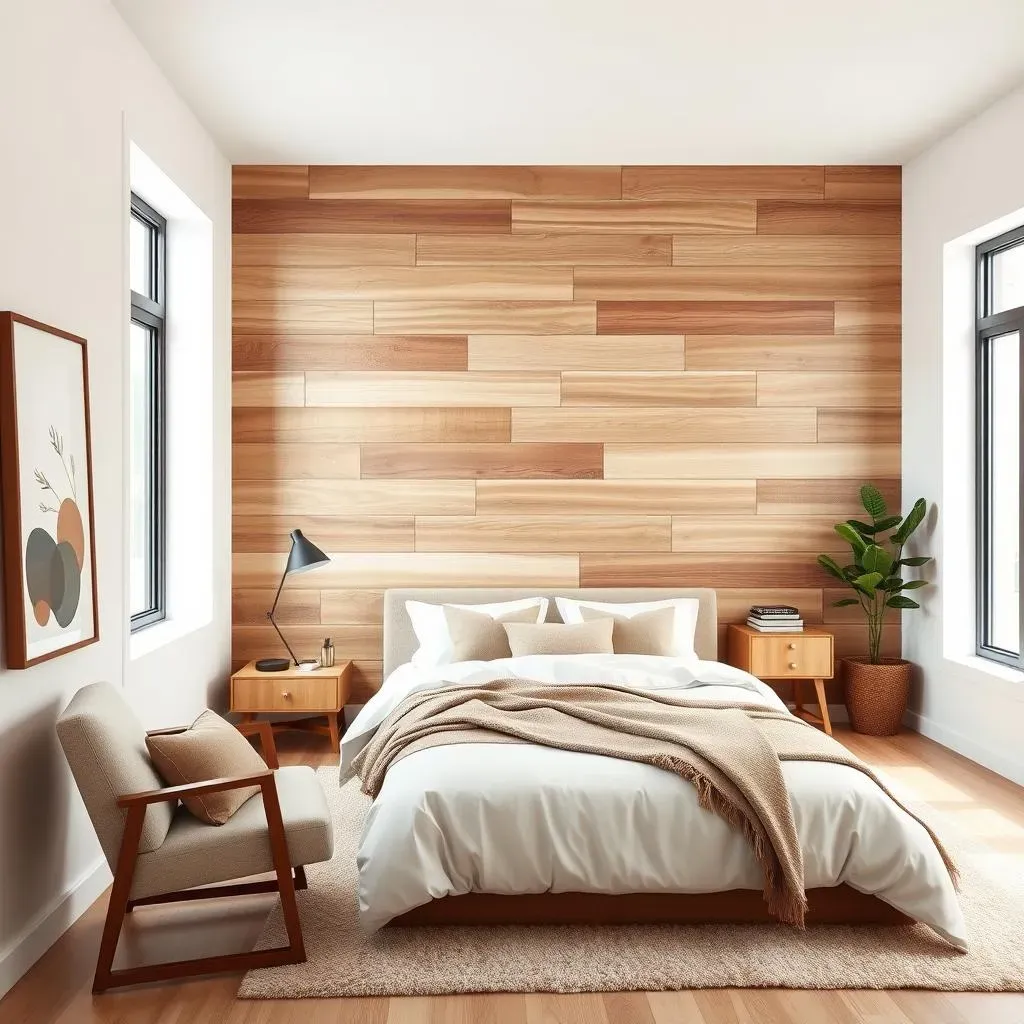
Creative Wood Accent Wall Ideas for Bedrooms
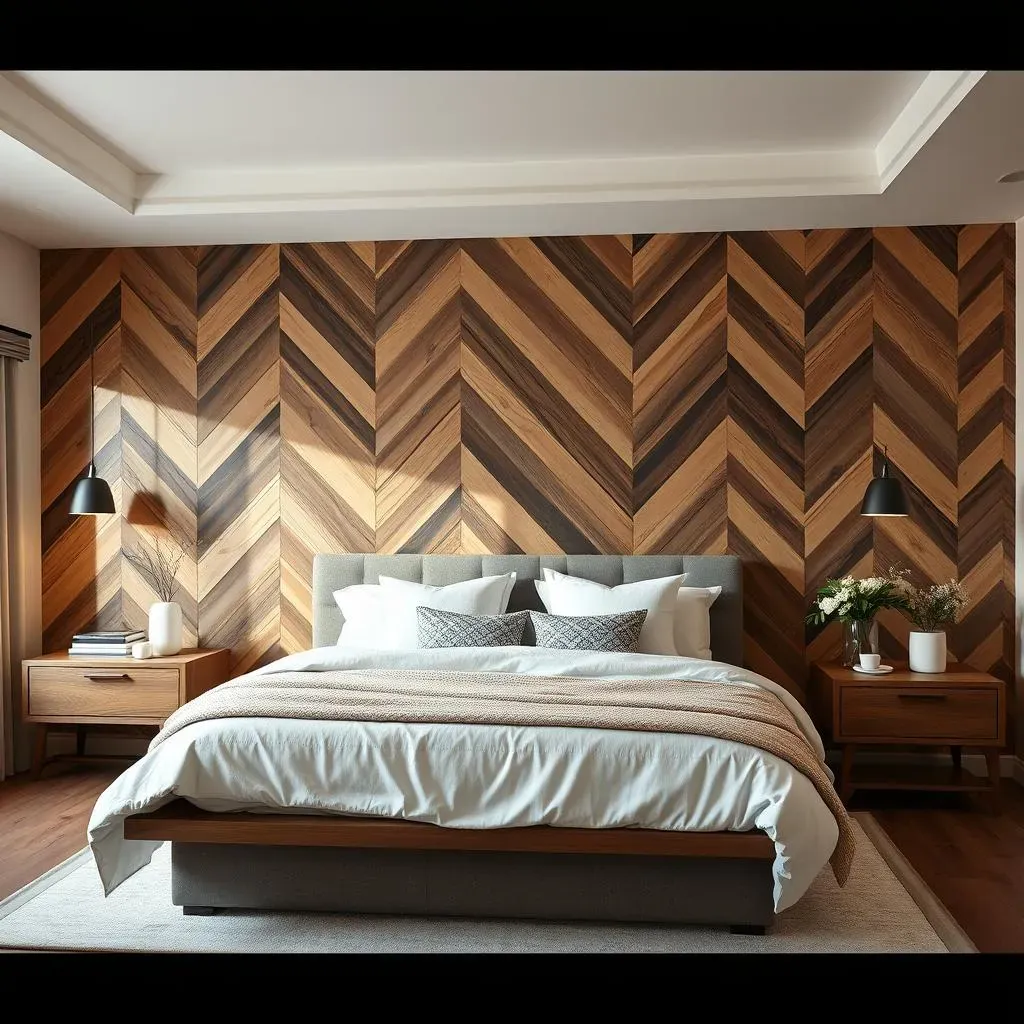
Creative Wood Accent Wall Ideas for Bedrooms
Alright, so you're sold on wood accent walls, right? Now comes the fun part: brainstorming ideas. Forget those boring, basic walls, we're aiming for something unique and eye-catching. Think beyond just horizontal planks. How about a herringbone pattern for a touch of sophistication? Or maybe a vertical stripe design to make your ceilings appear taller? And don't even get me started on geometric shapes – they can add a seriously modern edge to your room. The sky is pretty much the limit here, so don't be afraid to get a little wild with your imagination.
Another great way to shake things up is by playing with different wood finishes and colors. You could create a two-toned effect by pairing a dark stain with a lighter wood, or mix different wood species for a more eclectic look. Reclaimed wood is always a fantastic option for adding character and a touch of history to your bedroom. And if you're feeling adventurous, try painting the wood in a bold color that complements your existing decor, it can make a huge difference. Remember, the goal is to create something that reflects your personal style and makes you happy every time you walk into your room.
- Herringbone: A classic pattern with a sophisticated vibe.
- Vertical Stripes: Makes ceilings look higher and adds a touch of modern elegance.
- Geometric Shapes: Creates a bold and contemporary statement.
- Two-Toned: Combines different wood shades for a stylish look.
- Reclaimed Wood: Adds character and a rustic feel.
DIY Tips and Tricks for Installing Your Wood Accent Wall
DIY Tips and Tricks for Installing Your Wood Accent Wall
Getting Started: Prep Work is Key
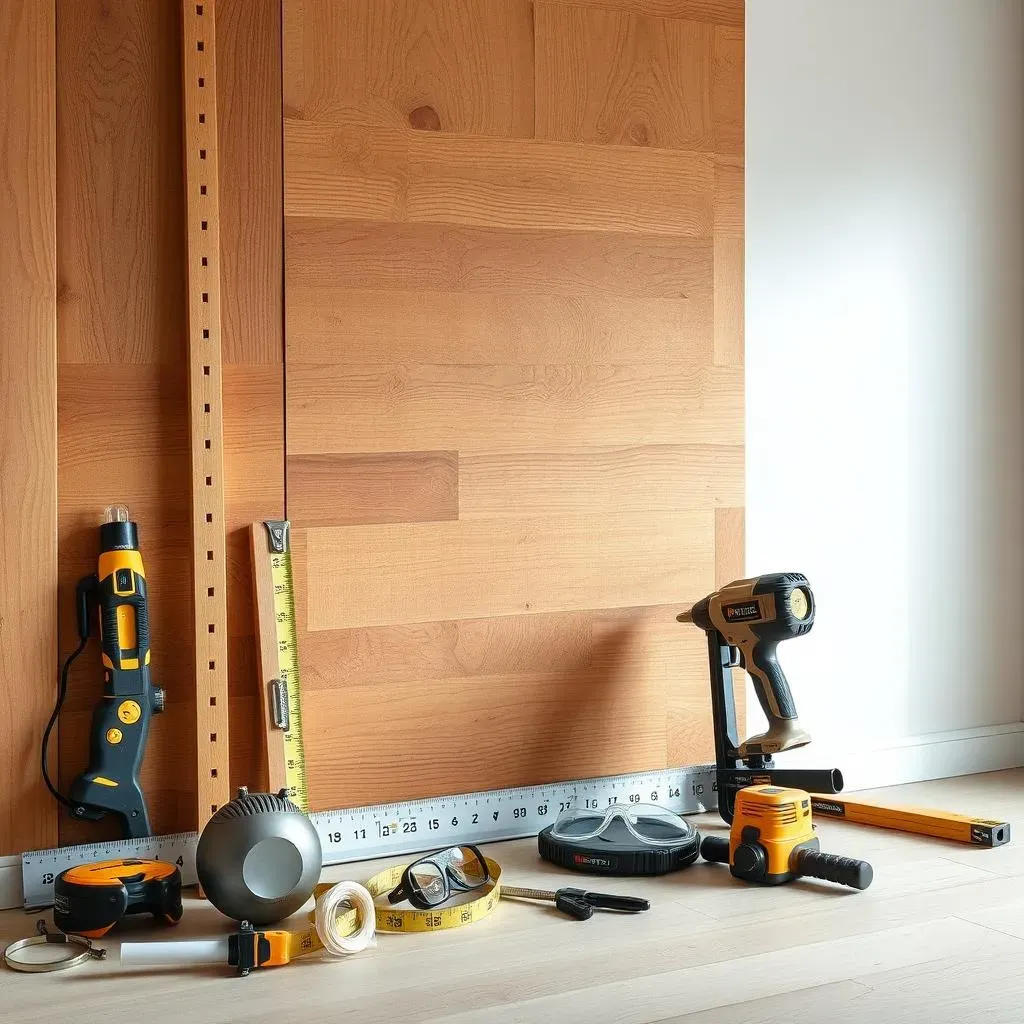
so you're ready to get your hands dirty? Before you even think about touching a piece of wood, you've got to prep your wall. This is not the time to skip steps, trust me. Start by cleaning the wall; any dust or grime will mess with your adhesive. Next, find your studs with a stud finder, and mark them. These are where you will secure the wood to the wall. If you're using adhesive, you may need to lightly sand the wall for better adhesion. This isn't rocket science, but it's important for a wall that will last. Remember, a little prep now saves a whole lot of headaches later.
And hey, about tools. You don't need a full workshop to do this. A level, a measuring tape, a saw (hand saw or power saw if you have one), a nail gun or hammer, and safety glasses are your best friends here. And if you are using adhesive, a caulking gun will be your sidekick. Before you start cutting, take a minute to plan your design. Measure your wall carefully and calculate how many planks you will need. Consider the pattern and how you'll handle the edges. It's helpful to sketch it out on paper or use a design app. This way, when you start installing the wood, you won't be making it up as you go.
The Nitty-Gritty: Installation Techniques
Now for the exciting part, putting the wood on the wall. If you are using nails, start by aligning the first plank against the ceiling or floor, making sure it's level. Nail it into the studs. If you're using adhesive, apply it to the back of the wood plank, press it firmly against the wall, and hold it for a few seconds. Then, continue adding planks, making sure to keep them level and aligned. Spacers are great for keeping consistent gaps between planks if that’s the style you are going for. If you are doing a pattern like herringbone or geometric shapes, this step will be more complex, so take your time and be patient.
When you get to the edges, you might need to cut the planks to fit. Measure twice, cut once. A good tip is to use a miter box for precise angled cuts. If you have outlets or switches, measure and cut the wood to fit around them. Be sure to turn off the power before you start working around any electrical outlets. You can use a jigsaw to make the cutouts. Once all the wood is up, inspect it. Look for any gaps or unevenness. You can use wood filler to fill any small gaps and caulk to seal the edges.
Tool | Use |
|---|---|
Stud Finder | Locates studs for secure nailing. |
Level | Ensures planks are straight. |
Measuring Tape | Accurate measurements for cutting and spacing. |
Saw (Hand or Power) | Cuts wood planks to size. |
Nail Gun or Hammer | Secures wood to the wall. |
Safety Glasses | Protects eyes during cutting and nailing. |
Finishing Touches and Final Thoughts
Once the wood is up and secure, it is time for the final touches. If you've used wood filler, sand it down lightly. You can also add a coat of stain or paint to further customize the look. If you want to seal the wood, a clear coat of polyurethane will do the trick. Once everything is dry, stand back and admire your handiwork. You did it! You have transformed your bedroom with a stunning wood accent wall.
This project is all about patience and attention to detail. Don't rush, double-check your measurements, and take breaks when needed. And of course, if you feel uncomfortable with any of these steps, don't hesitate to call in a professional. But if you follow these tips, you'll be well on your way to creating a beautiful, magazine-worthy wood accent wall for your bedroom. Now, go get started and make that bedroom a space you love!
"The details are not the details. They make the design." - Charles Eames
Wrapping Up Your Wood Accent Wall Journey
So, there you have it, a bunch of awesome ways to bring the beauty of wood into your bedroom. We've covered why wood accent walls are a fantastic choice, explored a range of styles to fit any taste, and even touched on how you can make it happen yourself. Remember, this isn't about following trends blindly, it's about creating a space that feels genuinely you. Whether you go for a rustic vibe, a modern statement, or something totally unique, the key is to have fun with it. Don't be afraid to experiment, make mistakes, and learn along the way. Your bedroom is your sanctuary, so make it a place you love with a stunning wood accent wall.