Table of Contents
Tired of staring at the same old boring bedroom walls? I get it. You crave a space that feels warm, inviting, and uniquely yours. That's where the magic of a wood accent wall comes in. Forget those generic painted surfaces; we're talking about adding texture, character, and a touch of nature to your personal sanctuary. This article isn't just a list of ideas; it's your guide to transforming your bedroom with stunning wood accent wall designs. We'll explore why wood is such a fantastic choice, dive into some seriously creative concepts for your space, and then, because I know you're itching to get started, I'll share some easy DIY tips to make your vision a reality. So, if you're ready to elevate your bedroom from drab to fab with some amazing wood accent wall ideas bedroom, let's get started!
Why Choose Wood Accent Walls for Your Bedroom?
Why Choose Wood Accent Walls for Your Bedroom?
let's talk about why wood accent walls are totally rocking the bedroom scene. First off, they bring a natural warmth that paint just can't match. Think about it: wood instantly makes a room feel cozier and more inviting. It’s like giving your bedroom a big, comforting hug. Plus, wood has this amazing ability to add texture and depth, transforming a flat, boring wall into a focal point that draws the eye. It's not just about aesthetics either; wood can actually improve the acoustics in your room, reducing echo and creating a more peaceful atmosphere. Seriously, who doesn't want a quieter, more stylish place to sleep?
And let's not forget the sheer versatility of wood. You can go for a rustic, farmhouse vibe with reclaimed wood, a sleek, modern look with smooth panels, or something completely unique with geometric patterns. The options are endless! It's like having a blank canvas where you can express your personal style and create a bedroom that truly reflects who you are. I mean, how many other wall treatments let you do that? And for those of you who are eco-conscious, using sustainably sourced wood is a fantastic way to bring nature indoors while being kind to the planet. It's a win-win!
Benefit | Description |
|---|---|
Warmth & Coziness | Wood adds a natural, inviting feel that paint can't replicate. |
Texture & Depth | Creates a focal point with visual interest, transforming flat walls. |
Improved Acoustics | Reduces echo, leading to a more peaceful bedroom environment. |
Versatile Style | Options range from rustic to modern, allowing for personalization. |
Eco-Friendly | Sustainably sourced wood is a responsible and stylish choice. |
Creative Wood Accent Wall Ideas for Bedrooms
Creative Wood Accent Wall Ideas for Bedrooms
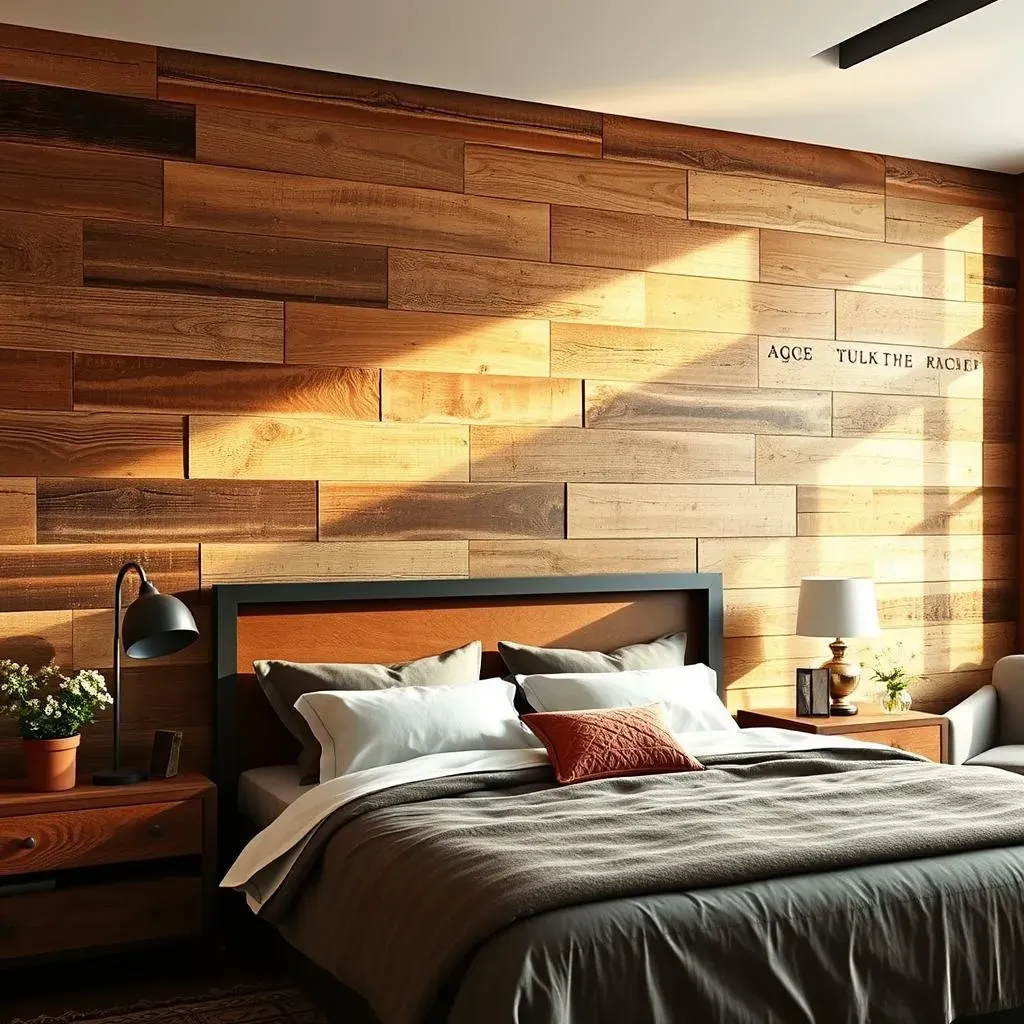
Reclaimed Wood Charm
Alright, let's get into some seriously cool ideas. First up, reclaimed wood. I'm talking about those weathered planks with all their imperfections and stories to tell. Using reclaimed wood for your accent wall adds a rustic, almost vintage vibe that's hard to beat. Each piece is unique, so your wall will be a one-of-a-kind masterpiece. Think of it as bringing a piece of history into your bedroom. It’s perfect for a farmhouse style or if you just want to add some character. I've seen some people use old barn wood, and the result is just stunning. It's like your wall has been on an adventure, and now it's chilling in your bedroom.
The best part about reclaimed wood? It's eco-friendly! You're giving old wood a new life instead of buying new materials. Plus, you can find it in all sorts of colors and textures, from light and airy to dark and moody. It really depends on the vibe you are going for. Don't be afraid to mix and match different types of wood for an even more eclectic look. It's all about creating a space that feels authentic and reflects your personality.
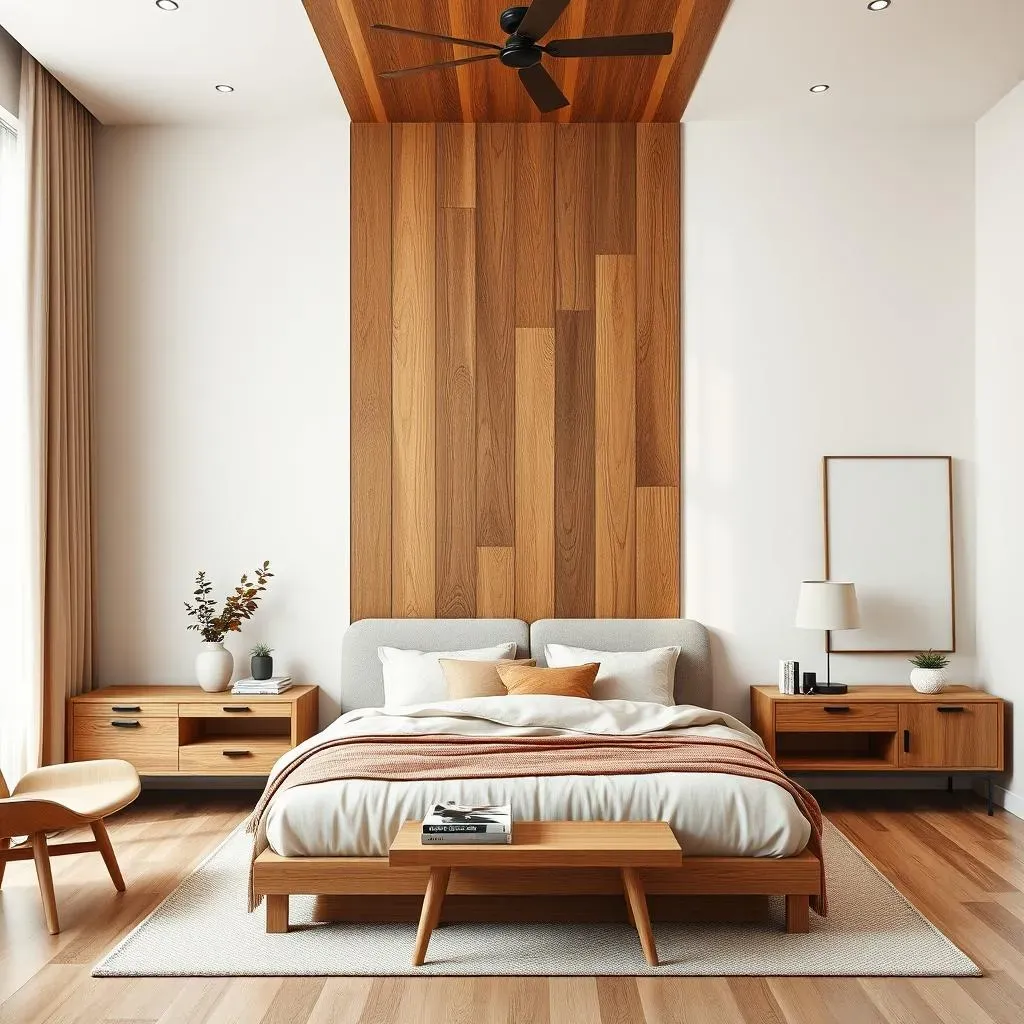
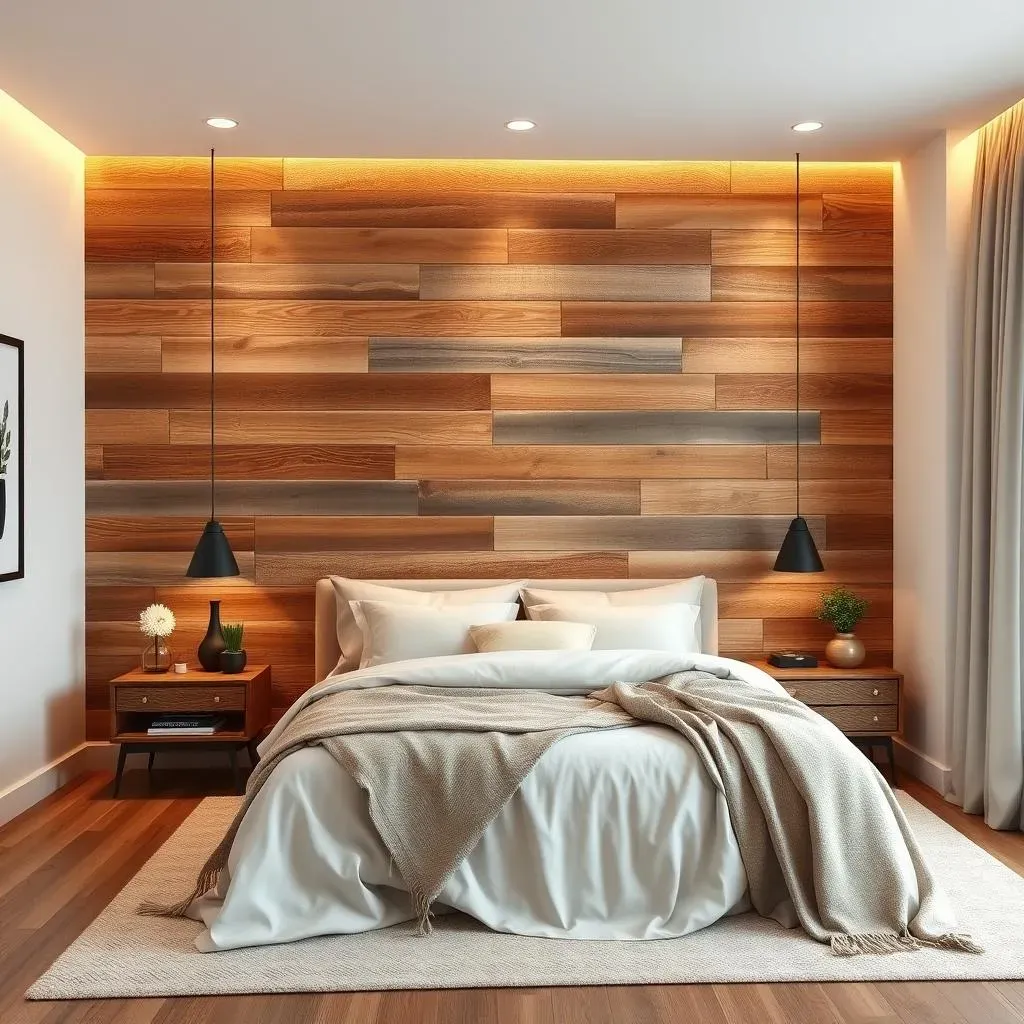
Sleek Modern Panels
Now, if rustic isn't your thing, how about some sleek, modern wood panels? These are perfect for creating a clean, sophisticated look. Think smooth, even planks with a minimalist design. You can use light-colored wood for a bright, airy feel or go for darker tones for a more dramatic effect. I've always been a fan of walnut, it adds a touch of luxury to any room. These panels are great for creating a sense of calm and order, which is exactly what you need in a bedroom. It's like having a perfectly tailored suit for your wall.
You can arrange the panels horizontally for a wider feel or vertically to make your ceilings look higher. The key here is precision and clean lines. You can even add subtle lighting behind the panels to create a soft, ambient glow. It’s a fantastic way to add depth and dimension without being too overwhelming. It's all about those subtle details that make a big difference.
Style | Description | Best for |
|---|---|---|
Reclaimed Wood | Weathered, unique planks with imperfections. | Rustic, farmhouse, vintage styles |
Sleek Panels | Smooth, even planks with a minimalist design. | Modern, contemporary, minimalist styles |
Geometric Patterns | Wood pieces arranged in various shapes and patterns. | Eclectic, artistic, bold styles |
Shiplap | Overlapping planks with a classic, clean look. | Coastal, traditional, casual styles |
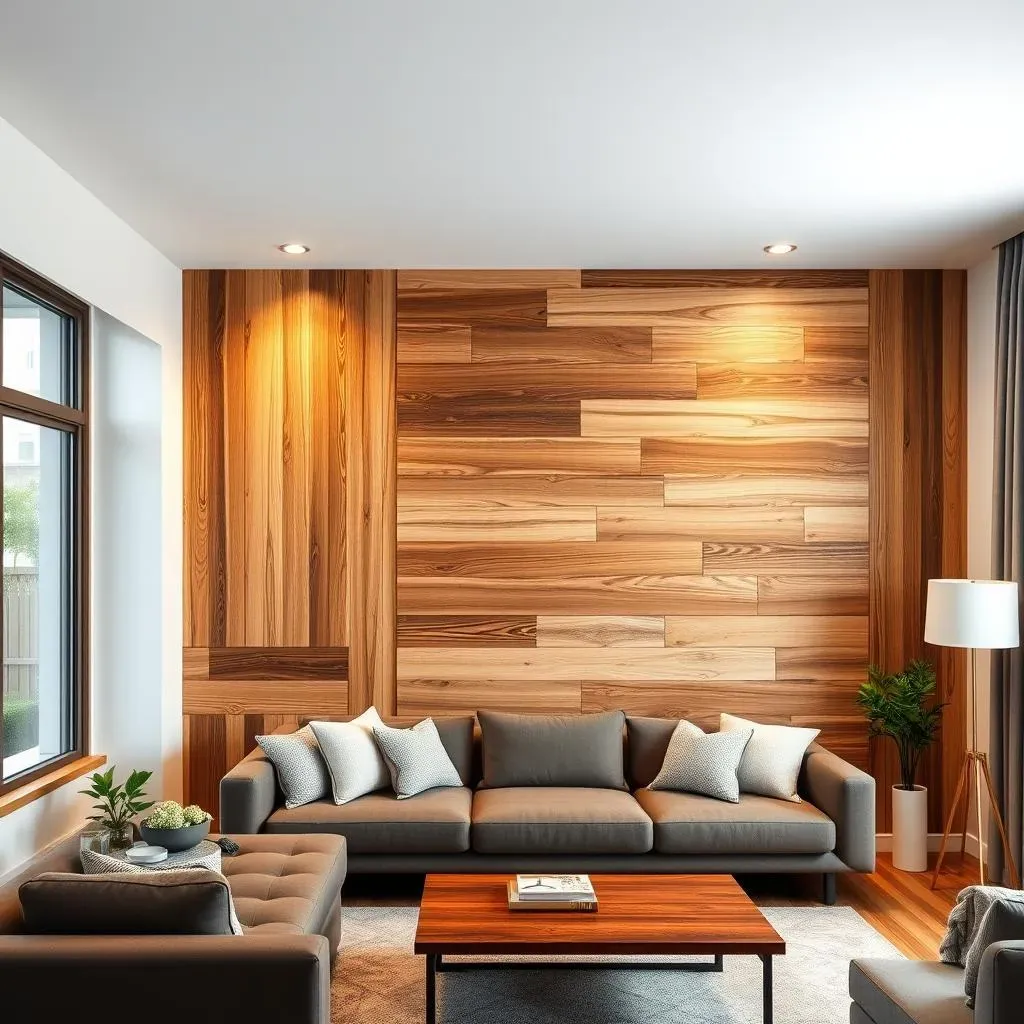
Geometric Wood Designs
let’s get a little adventurous. Geometric wood designs are where things get really interesting. Imagine arranging wood pieces in triangles, chevrons, or even more complex patterns. This is where you can really let your creativity shine. It's like turning your wall into a work of art. I love this option because it’s so unexpected and adds a dynamic feel to your bedroom. It’s a great way to show off your personality and make a statement.
You can use different wood types and stains to create even more contrast and visual interest. Maybe a light wood for the main pattern and a darker wood for the accents. Or you can paint some of the wood pieces to introduce pops of color. This is a great option for those who love a bit of drama and want their bedroom to be anything but boring. It's like having a secret code on your wall, only it's super stylish.
DIY Tips and Tricks for Installing Your Wood Accent Wall
DIY Tips and Tricks for Installing Your Wood Accent Wall
Planning and Preparation
Alright, so you've got your wood picked out and you're itching to get started? Hold your horses! Before you grab that hammer, a little planning goes a long way. First, measure your wall, like, twice. You don't want to end up with a bunch of leftover wood or, even worse, not enough. Sketch out your design, even if it's just a rough idea. This will help you visualize the end result and figure out how much wood you'll need. Trust me, it's way easier to erase a line on paper than to redo a whole section of your wall. And speaking of materials, make sure you have everything you need: a level, measuring tape, saw, nails or screws, adhesive, and safety glasses. Safety first, people! Also, consider the type of wall you're working with. Is it drywall, plaster, or something else? This will affect how you attach the wood.
Don't forget to prep your wall, too. Clean it up, fill any holes or cracks, and make sure it's nice and smooth. This will give your wood accent wall a solid foundation. If you're painting or staining the wood, do that before you install it. It's much easier than trying to paint around all the edges once it's up. I learned that the hard way once. And one more thing: think about how you'll deal with outlets and light switches. You might need to cut holes in the wood, so plan those out in advance. It's all about the details, my friends!
Installation Techniques
so you've measured, planned, and prepped. Now, let's get to the fun part: actually putting the wood up! Start with a level line, either at the top or bottom, depending on your design. This is your guide, so make sure it's perfectly straight. Use a level and a pencil to mark the line. Then, begin attaching the wood pieces, either with nails, screws, or construction adhesive. If you're using nails or screws, use a stud finder to locate the studs in your wall, this is the best way to make sure the wood is securely attached. If you're using adhesive, apply it evenly to the back of the wood and press it firmly against the wall. Don't use too much glue, you don't want it oozing out all over the place. Work your way across the wall, making sure each piece is level and aligned with the previous one. This is where that patience comes in handy.
If you have to cut pieces to fit around corners or outlets, measure carefully and use a saw to make clean cuts. A miter saw is your best friend here, but a hand saw can work too if you're careful. Once all the wood is up, take a step back and admire your work. You can fill any nail holes or gaps with wood filler, sand it smooth, and add a final coat of paint or stain if needed. Remember, the goal is to make it look seamless and professional. And if you're not feeling super confident about the cutting part, there's no shame in asking for help! Maybe a friend who's good with tools or a professional, you do you. The important thing is that you are happy with the result.
Step | Description |
|---|---|
Measure Twice | Get accurate dimensions of your wall. |
Sketch Your Design | Visualize the final result and plan your layout. |
Gather Materials | Collect all necessary tools and supplies. |
Prep the Wall | Clean, fill holes, and ensure a smooth surface. |
Attach the Wood | Use nails, screws, or adhesive to secure wood to the wall. |
Finishing Touches | Fill gaps, sand, and apply final coats of paint or stain. |
Troubleshooting
Let's be real, things don't always go perfectly when you're DIY-ing. You might run into a few snags along the way, and that's totally okay! One of the most common issues is that the wood doesn't lay flat against the wall, this usually means that the wall isn't completely even, and you might need to add some shims behind the wood to level it out. Also, sometimes the wood might split when you're nailing or screwing it, to prevent this, pre-drill small holes before you screw, and if using nails, hit them gently. If you mess up a cut, don’t panic, just grab another piece of wood and try again, we've all done it!
Another common problem is that the wood might not be perfectly aligned, if that's the case, take a step back and see where the misalignment is, then carefully adjust the wood pieces. If you're having trouble with outlets or light switches, turn off the power, remove the cover plates, and carefully cut the wood to fit around them. It might seem intimidating at first, but just take your time and follow all the safety precautions. And remember, there are tons of online tutorials and videos that can walk you through specific challenges. Don't be afraid to ask for help or do some extra research. The most important thing is to have fun and enjoy the process. It's your bedroom, and you're making it awesome!
"The beauty of DIY is that it's not about perfection, it's about creating something that's uniquely yours." - Someone who probably messed up a lot
Wrapping Up Your Wood Accent Wall Adventure
So, we've journeyed through the wonderful world of wood accent walls for the bedroom. From understanding their inherent charm to sparking your creativity with various design concepts, and arming you with some DIY know-how, you're now ready to make a real change. Remember, your bedroom is your haven, and a wood accent wall isn't just a design choice; it's an expression of your personal style and a way to create a space that truly feels like home. Don't be afraid to experiment, get your hands dirty, and most importantly, have fun with it! Your perfect wood accent wall is waiting to be brought to life.