
Table of Contents
Thinking about adding some character to your room? A wood accent wall might be just what you need. It's a fantastic way to bring warmth and texture into any space, and the best part is, you can totally do it yourself. But before you grab a hammer and some random planks, let's talk about the real deal: what to use for wood accent wall. This isn't just about slapping up any old wood; it's about choosing the right materials, having the correct tools, and knowing the steps to take so you don't end up with a wall that looks like a toddler's art project gone wrong. We're gonna walk through picking the perfect wood, gathering your gear, and even give you a step-by-step guide to make sure your wall is the envy of all your friends. So, ready to transform your space? Let’s get started!
Choosing the Right Wood for Your Accent Wall
Choosing the Right Wood for Your Accent Wall
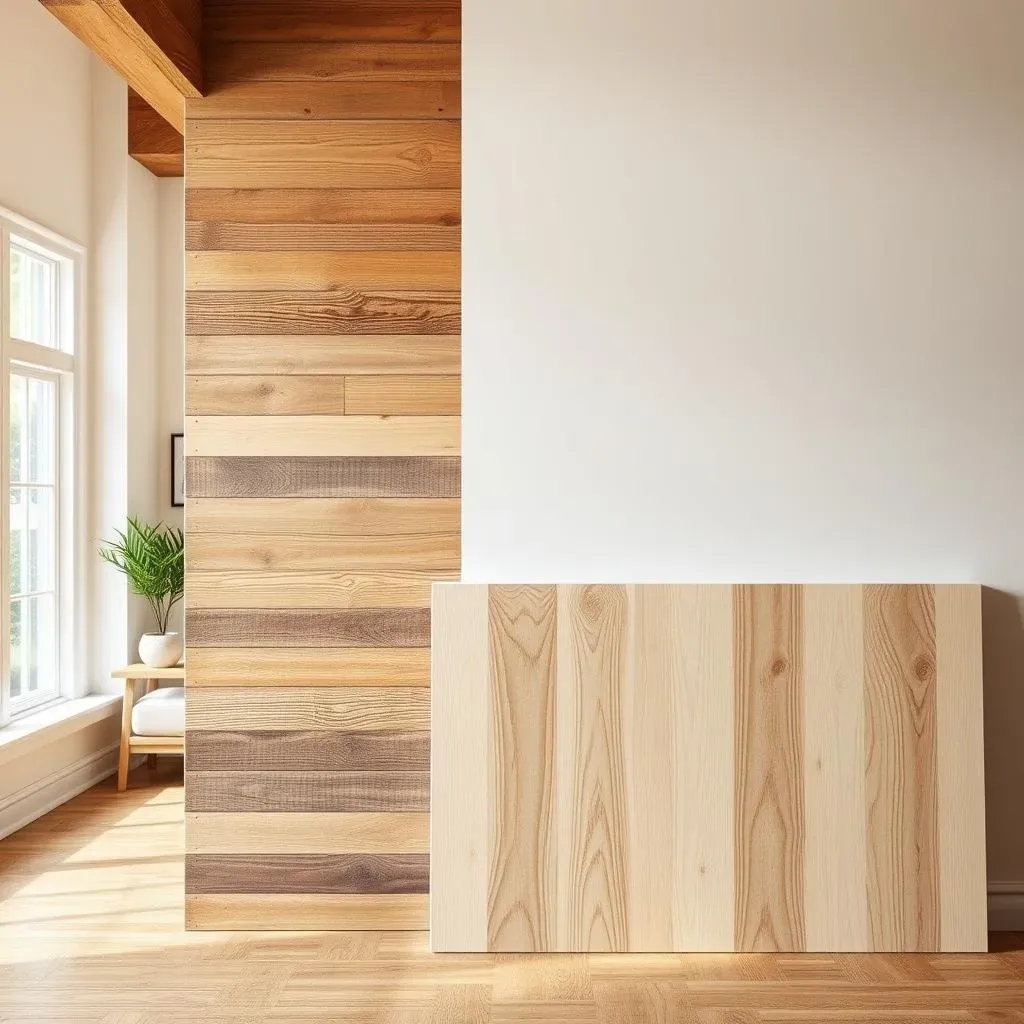
Solid Wood vs. Engineered Wood
so you're itching to get started on your wood accent wall, that's awesome! First things first, let's chat about the wood itself. You've basically got two main camps here: solid wood and engineered wood. Solid wood, like pine or oak, is what you get straight from the tree. It's got that classic, natural look and feel, and each piece is unique. But, it can be a bit pricey and might warp or expand with changes in humidity. Think of it like that vintage car—gorgeous but requires a bit of extra care.
Engineered wood, on the other hand, is like the modern, reliable SUV. It includes things like MDF (Medium-Density Fiberboard) and plywood. These are made by pressing together wood fibers or layers of wood. They're generally cheaper, more stable (less likely to warp), and come in consistent sizes and shapes. If you're going for a super clean, modern look, engineered wood might be your best bet. Plus, they're often smoother, so painting them is a breeze.
Wood Type | Pros | Cons | Best For |
|---|---|---|---|
Solid Wood (Pine, Oak) | Natural look, unique grain | More expensive, can warp | Rustic, traditional styles |
Engineered Wood (MDF, Plywood) | Cheaper, stable, consistent | Less natural look, may need primer | Modern, clean looks |
Considering the Look and Feel
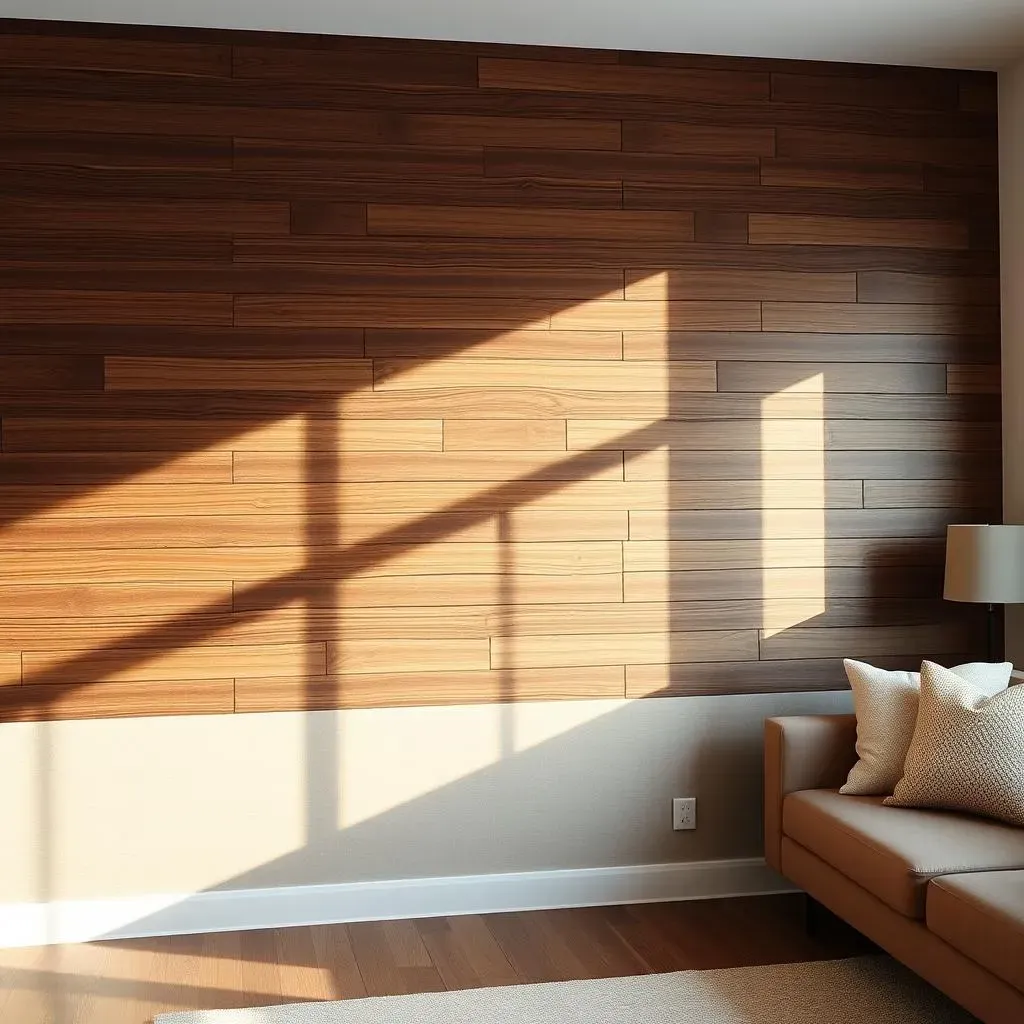
Now, let’s get into the fun part: picking the style. The type of wood you choose really sets the tone of your accent wall. If you're into a cozy, rustic vibe, go for woods with knots and visible grain. Pine is great for this, and you can even use reclaimed wood for an extra dose of character. Think about those old barns and fences – they tell a story, right? On the flip side, if you're after something sleek and modern, you’ll want a smoother, more uniform wood, like MDF. You can even use pre-primed MDF to save yourself some prep time. It’s like choosing an outfit—it needs to match the vibe of your space.
Also, think about the color and finish you're aiming for. Are you going to paint it? Stain it? Leave it natural? If you're painting, MDF is a great choice because it takes paint really well. If you want to stain it and show off the wood grain, then solid wood might be better. Remember, the finish isn't just about looks, it also protects the wood, so don’t skip this step. A good finish will keep your accent wall looking sharp for years to come.
"The details are not the details. They make the design." - Charles Eames
Essential Tools and Materials for Wood Accent Wall Installation

Essential Tools and Materials for Wood Accent Wall Installation
The Must-Have Tools
Alright, so you've picked your wood, now comes the fun part – gathering your tools. You wouldn't try to bake a cake without a mixing bowl, right? Same deal here. First off, you're going to need something to cut the wood. A miter saw is your best friend for getting nice, clean, angled cuts, especially if you're doing a pattern. If you don't have one, a circular saw will work, just be extra careful with your measurements. A level is super important to make sure your boards are straight (unless you're going for a crazy, abstract look). And, of course, you need a measuring tape and a pencil for marking everything out. Oh, and don’t forget safety glasses! You don't want a splinter in your eye, trust me.
Next up, you'll need something to attach the wood to the wall. A nail gun is a lifesaver here, making the job go way faster than hammering each nail by hand. An 18-gauge or 16-gauge brad nailer works great for most accent wall projects. If you're using thicker wood or have plaster walls, you might want to consider using construction adhesive in addition to nails. It'll give you that extra hold. Finally, you'll need a stud finder to locate the studs in your wall, so you can secure the wood properly. You don’t want your beautiful creation falling down!
The Necessary Materials
tools are only half the battle. Now let's talk about the actual materials you’ll need. Obviously, the most important is the wood itself. Make sure you have enough, so you don’t have to make a last-minute trip to the store. It’s always better to have a little extra than not enough. Then there are the nails. Make sure you've got the right size for your nail gun and the thickness of your wood. And if you’re using construction adhesive, grab a tube or two of that as well.
You might also need some wood filler or spackle to fill nail holes and seams, especially if you're going for a seamless look. Sandpaper is essential to smooth things out before painting or staining. And speaking of painting or staining, you’ll need primer, paint, stain, and a brush or roller, depending on the finish you choose. Don’t forget painter’s tape to get those crisp, clean lines. And last but not least, grab some rags or cloths to clean up any mess. Trust me, there will be some mess.
Material | Purpose | Notes |
|---|---|---|
Wood (Solid or Engineered) | Main component of the accent wall | Choose based on style and budget |
Nails | Attaching wood to the wall | Use appropriate size for nail gun |
Construction Adhesive (Optional) | Extra hold for wood panels | Good for thicker wood or plaster walls |
Wood Filler/Spackle | Filling nail holes and seams | For a seamless look |
Sandpaper | Smoothing surfaces | Various grits for different steps |
Primer, Paint, or Stain | Finishing the wood | Choose based on desired look |
Painter's Tape | Creating crisp lines | Essential for clean paint jobs |
Safety First
Before you start cutting and nailing, let’s quickly chat about safety. This stuff is important. Always wear safety glasses when you’re using power tools – wood chips and nails have a way of finding their way into your eyes. If you’re using a saw, make sure you're using it properly and that your work area is clear. Wear a mask if you’re sanding or using any finishes that have strong fumes. And finally, pay attention to what you are doing, it's easy to get distracted, but that is when mistakes happen. A few extra minutes of prep and safety precautions will save you a lot of headaches, and maybe even a trip to the emergency room. No one wants that, right?
"The best preparation for tomorrow is doing your best today." - H. Jackson Brown Jr.
StepbyStep Guide: Creating Your Wood Accent Wall
StepbyStep Guide: Creating Your Wood Accent Wall
Planning Your Design
so you've got your wood and your tools, awesome! Now, before you start nailing anything, let's talk about planning. I know, I know, planning isn’t as exciting as just jumping in, but trust me, it's crucial. First, measure your wall carefully. You need to know exactly how much space you’re working with, so grab that measuring tape and jot down those numbers. Then, think about the design you want. Are you going for a simple horizontal or vertical pattern? Or something more complex, like a chevron or geometric design? Sketch it out on a piece of paper, or even better, use a digital tool to visualize it. This will help you figure out how much wood you need and where to make your cuts. It’s like drawing a map before a road trip—it keeps you from getting lost.
Next up, figure out your spacing. Are you going to have gaps between the wood pieces? If so, how big? A good trick is to use spacers – you can buy them, or even just use thin pieces of wood – to get consistent gaps. This makes everything look super professional. Don't forget to consider the starting point. Do you want your pattern to start at the floor or the ceiling? This is a good time to check if your wall is level – walls are rarely perfect. Use a level to see if you need to make any adjustments to your design to keep things straight. Trust me, a little planning goes a long way in making your wall look amazing.
Step | Action | Why |
|---|---|---|
1 | Measure Your Wall | To determine the dimensions and amount of materials needed |
2 | Sketch Your Design | To visualize the final look and plan the layout |
3 | Plan Spacing | To ensure consistent gaps and a professional finish |
4 | Check Wall Level | To make sure your design is straight and even |
Cutting and Preparing the Wood
Alright, planning is done, now it's time to cut some wood! Get your miter saw or circular saw ready, and make sure your safety glasses are on. Measure your wood pieces according to your plan and make your cuts. If you have a lot of pieces, you can set up a stop block on your saw to make repetitive cuts faster and more accurate. If you’re using solid wood, you might want to sand down any rough edges or splinters. Engineered wood is usually pretty smooth, but it’s still a good idea to give it a quick once-over.
Next up, it's time to prime and paint or stain your wood. I like to do this before attaching it to the wall because it’s way easier to paint flat pieces than trying to get in between all the gaps. Apply a coat of primer first if you’re painting, and let it dry completely. Then, apply your paint or stain. If you're doing a multi-coat finish, make sure each coat is fully dry before adding the next one. This might seem tedious, but it's worth it for a smooth, even finish. Think of it like prepping a canvas before painting—it makes the final artwork look so much better.
Installing Your Wood Accent Wall
the wood is cut, prepped, and ready to go! Now comes the moment you've been waiting for – installing your wood accent wall. Start by finding the studs in your wall using a stud finder. You'll want to nail into these for a secure hold. If you are using construction adhesive, apply it to the back of your first piece of wood, then position it on the wall according to your plan. Use your nail gun to secure it to the studs. Use a level to make sure your first piece is straight. This first piece is the most important, because everything else will be based on this.
Continue adding pieces, working your way across the wall. Use your spacers to keep the gaps consistent. If you are using construction adhesive, you might want to use painter's tape to hold the boards in place while the adhesive dries. Once all the wood is installed, fill any nail holes or seams with wood filler or spackle. Let it dry completely, and then sand it smooth. Then, you can do a final touch up with paint or stain if needed. And that’s it! Step back and admire your new wood accent wall. You did it!
"The secret of getting ahead is getting started." - Mark Twain
Wrapping Up Your Wood Accent Wall Adventure
So there you have it, a complete guide on what to use for a wood accent wall. From choosing the right wood, to gathering your tools, and finally, the step-by-step process of putting it all together. Remember, it's okay to start small and embrace the imperfections. This project is about adding your personal touch to your space, and with a little patience and the right know-how, you can create a stunning wood accent wall that'll make you proud. So, go ahead, grab your tools, and let's get building!