
Table of Contents
Ready to ditch those boring walls and inject some serious personality into your space? You're in the right place! Installing a wood trim accent wall is a game-changer, a simple DIY project that can elevate any room from drab to fab. I'm talking instant style upgrade, people! I recently tackled this project in my own master bedroom as part of a much-needed room makeover, and let me tell you, the results were stunning. But before you grab your hammer and nails, let's get real. This isn't just about slapping some wood on a wall. It's about planning, precision, and a little bit of elbow grease. In this guide, I'm going to walk you through every step of the process, from gathering your supplies to putting those final, flawless touches on your brand-new accent wall. I'll share my hard-earned wisdom, including the mistakes I made along the way (so you don't have to!). Consider this your ultimate guide on how to install accent wall trim. We'll cover everything from prepping your space and gathering the right tools, to the actual installation process and those all-important finishing touches. Get ready to transform your room and impress your friends with your newfound DIY skills!
Prep Like a Boss: Planning Your Accent Wall Install

Prep Like a Boss: Planning Your Accent Wall Install
Alright, let's talk strategy! Before you even think about picking up a piece of wood, you need a solid plan. This is where you decide exactly what kind of vibe you're going for. Are we talking modern and minimalist? Rustic and cozy? Bold and geometric? The possibilities are endless! Start by browsing Pinterest, Instagram, or even home decor magazines to get some inspiration. Save the images that speak to you – the ones that make you say, "Yes! I want my wall to look like THAT!"
Once you have a general idea, it's time to get specific. Consider the size and shape of your wall, the existing colors and textures in the room, and your overall budget. A massive, intricate design might look amazing, but it could also be a pain to install and cost a fortune. Sometimes, simple is better! Don't be afraid to sketch out your design on paper or use a digital design tool to visualize the finished product. Play around with different patterns, trim sizes, and paint colors until you land on something you truly love.
Next up, measure, measure, MEASURE! Seriously, this is crucial. Accurately measure the width and height of your wall, and note any obstacles like windows, doors, or outlets. Use these measurements to calculate how much wood trim you'll need. It's always a good idea to buy a little extra, just in case you make a mistake (trust me, it happens!). Finally, think about the placement of your accent wall. Which wall will make the biggest impact in the room? Which wall will complement the existing furniture and decor? These are all important questions to consider before you start.
- Gather Inspiration: Pinterest, magazines, model homes.
- Define Your Style: Modern, rustic, geometric, etc.
- Measure Accurately: Width, height, obstacles.
- Sketch Your Design: Visualize the finished product.
- Consider Placement: Which wall maximizes impact?
Don't rush this planning stage. Take your time, do your research, and make sure you're 100% happy with your design before moving on. A little planning goes a long way in ensuring a smooth and successful accent wall installation. Trust me, your future self will thank you!
Tools & Treasures: Gathering What You Need to Install Your Accent Wall
Tools & Treasures: Gathering What You Need to Install Your Accent Wall
so you've got your design locked down – awesome! Now it's time for the fun part: gathering your supplies. Think of this as your treasure hunt, but instead of gold, you're after the tools and materials that will bring your accent wall dreams to life. First, let's talk wood. The type of trim you choose will depend on your desired style and budget. Common options include MDF (medium-density fiberboard), pine, or even reclaimed wood for a more rustic look. MDF is generally the most affordable and easiest to work with, but pine offers a more natural wood grain. Reclaimed wood can add character and charm, but it may require more prep work.
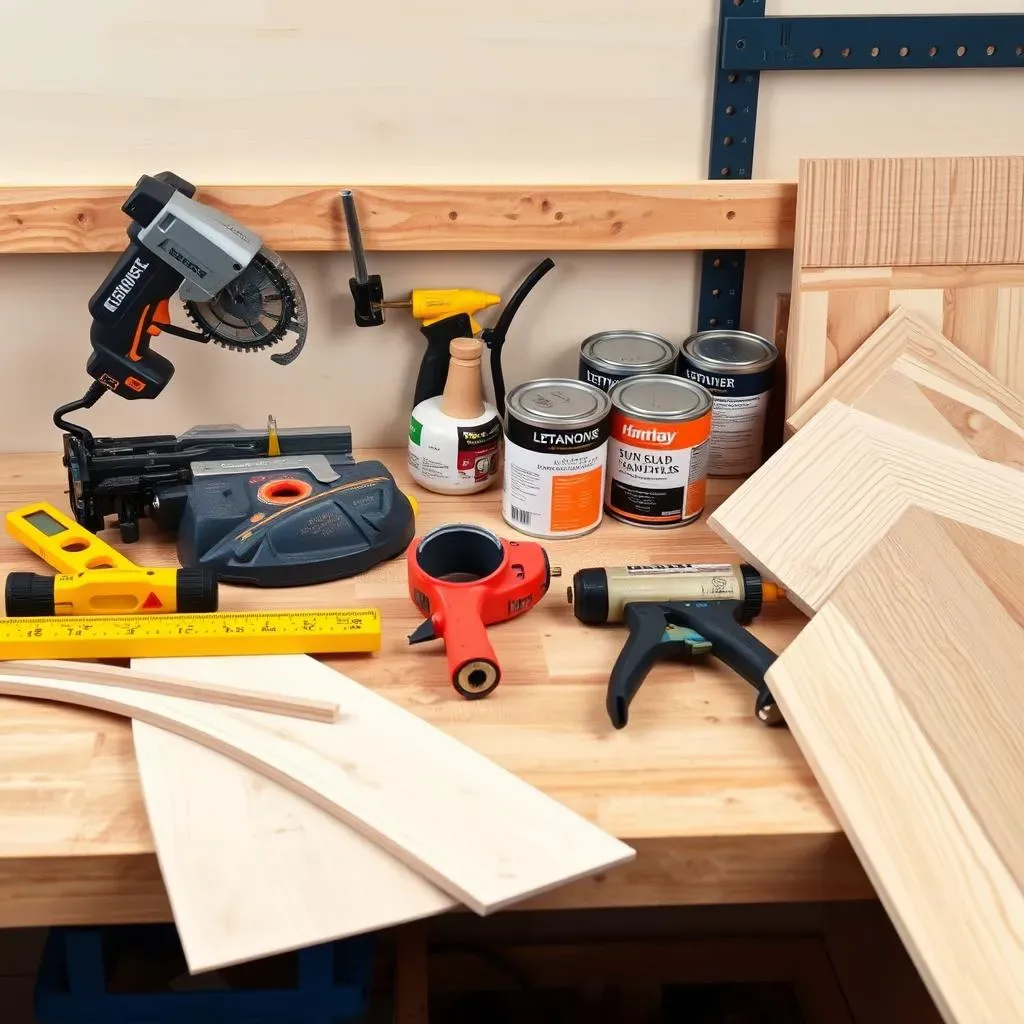
Beyond the wood itself, you'll need a few essential tools. A miter saw is a must for making accurate angled cuts, especially if your design involves intricate patterns. A nail gun will make quick work of attaching the trim to the wall, but a hammer and nails will also do the trick (just be prepared to spend a little more time and effort). A level is crucial for ensuring that your trim is straight and even, and a stud finder will help you locate the wall studs for secure attachment. Don't forget safety glasses and a dust mask to protect yourself from flying debris and wood dust! And of course, you'll need caulk, wood filler, sandpaper, primer, and paint to give your accent wall that professional, finished look.
Here’s a quick checklist to make sure you’ve got everything covered:
- Wood Trim: MDF, pine, reclaimed wood – your choice!
- Miter Saw: For precise angled cuts.
- Nail Gun or Hammer & Nails: For attaching the trim.
- Level: To keep things straight and even.
- Stud Finder: To locate those essential wall studs.
- Safety Glasses & Dust Mask: Safety first!
- Caulk: To fill in those pesky gaps.
- Wood Filler: To hide nail holes and imperfections.
- Sandpaper: For a smooth finish.
- Primer & Paint: To give your accent wall its final color.
- Measuring Tape: For, well, measuring.
- Pencil: For marking cuts and placements.
Pro Tip: Before you head to the hardware store, take some time to research the different types of wood trim and tools available. Read reviews, watch videos, and talk to the experts at the store. The more you know, the better equipped you'll be to make informed decisions and choose the right supplies for your project.
Nailing It: StepbyStep Guide on How to Install Accent Wall Trim
Nailing It: StepbyStep Guide on How to Install Accent Wall Trim
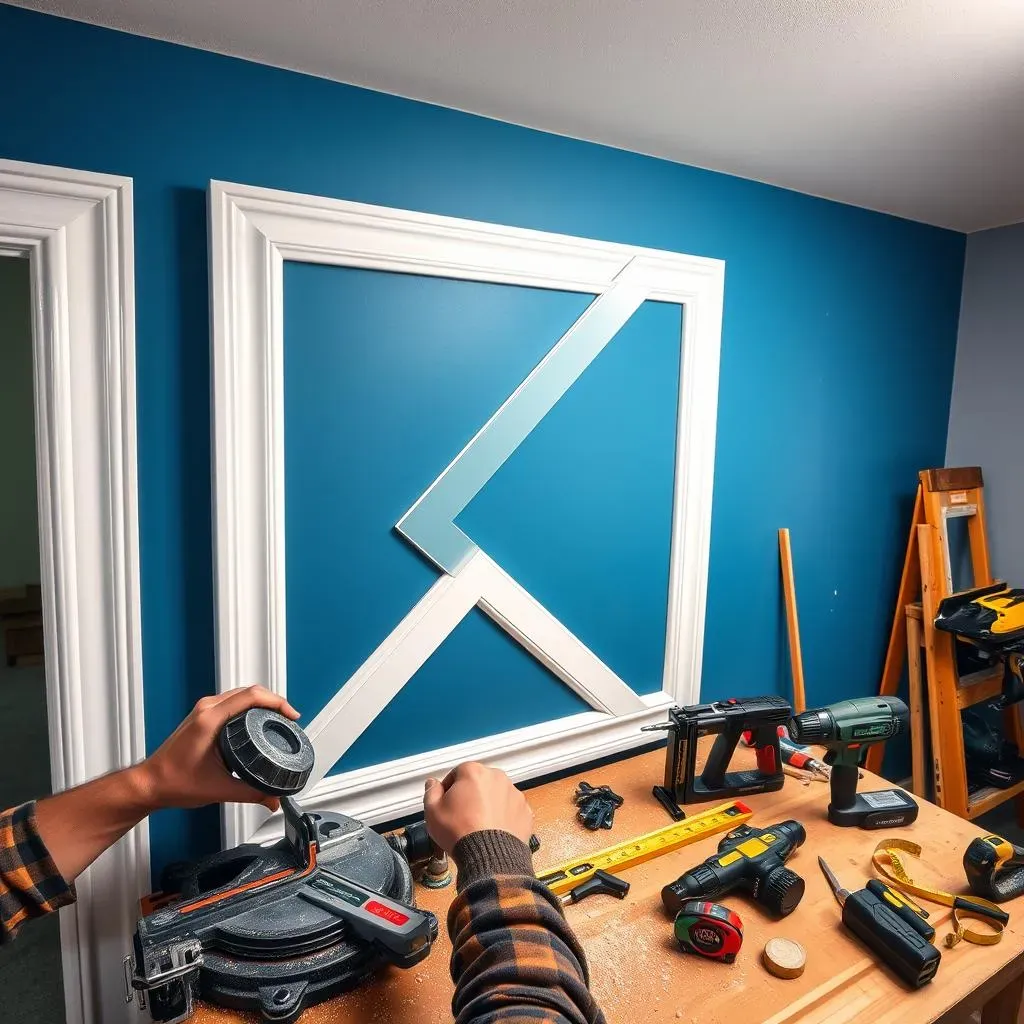
Alright, team, this is where the magic happens! You've prepped, you've gathered, now it's time to install your accent wall trim. First things first, grab that stud finder and mark the location of each stud on your wall. This is crucial for ensuring that your trim is securely attached and won't go anywhere. Next, start with your outline trim – the pieces that will frame your entire design. Using your miter saw, cut the trim pieces to the correct length and angle (if necessary). Apply a bead of construction adhesive to the back of each piece and carefully position it on the wall, aligning it with your pencil marks. Use your nail gun or hammer and nails to attach the trim to the studs. Make sure the trim is level before securing it completely.
Once your outline is in place, you can start filling in the design. This is where your creativity can really shine! Cut each trim piece to the correct size and angle, and attach it to the wall using the same method as before. Be sure to maintain consistent spacing between the trim pieces, unless your design calls for something different. As you work, take a step back every now and then to admire your progress and make sure everything looks balanced and symmetrical. Don't be afraid to make adjustments along the way – it's all part of the process!
Here’s a breakdown of the key steps:
- Mark the Studs: Use a stud finder to locate and mark each stud.
- Install the Outline: Cut, adhere, and nail the perimeter trim.
- Fill in the Design: Cut and attach the remaining trim pieces.
- Maintain Spacing: Ensure consistent gaps between trim pieces.
- Check for Balance: Step back and adjust as needed.
Finishing Touches: From Imperfections to Perfection on Your Accent Wall Install
Finishing Touches: From Imperfections to Perfection on Your Accent Wall Install
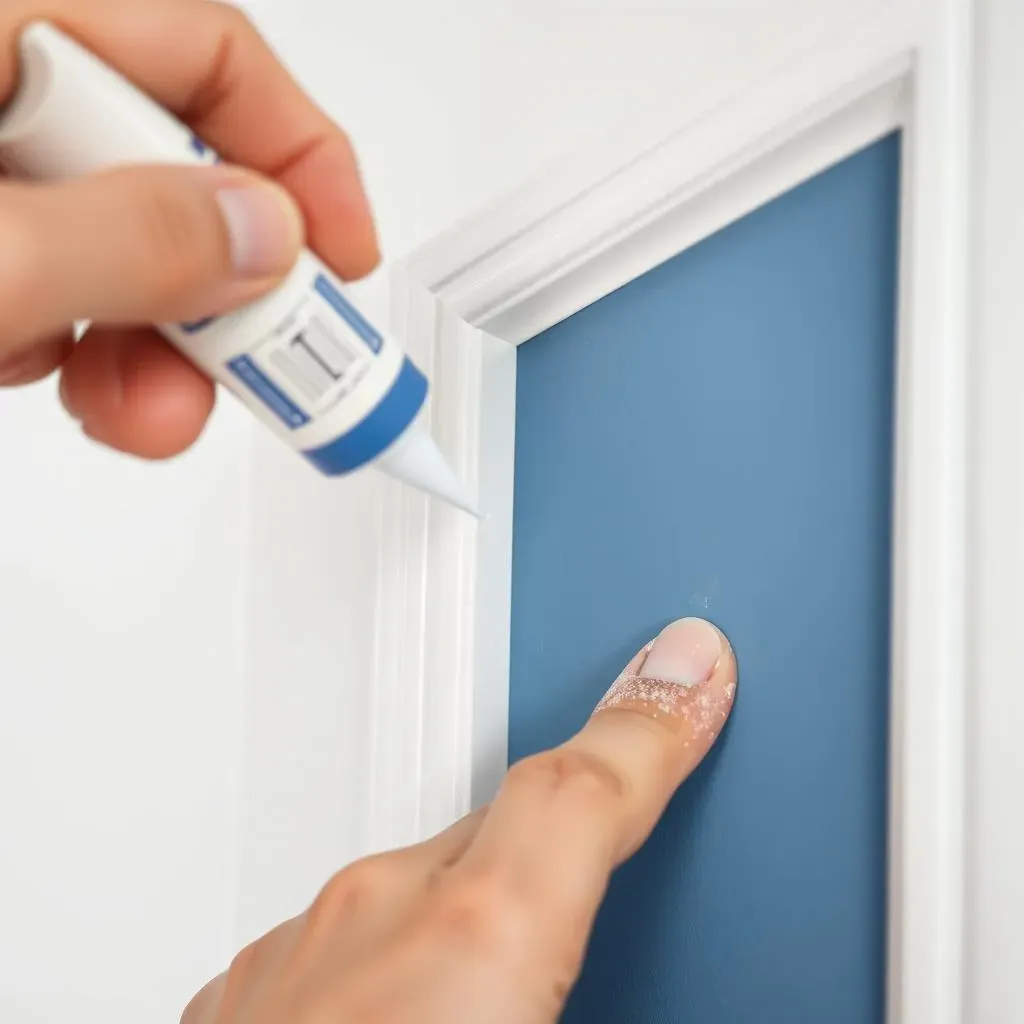
Caulk and Fill: Hiding the Evidence
let's be honest, even the most skilled DIYers end up with a few gaps and imperfections along the way. That's where caulk and wood filler come to the rescue! Caulk is your best friend for sealing the seams between the trim and the wall, creating a seamless, professional look. Apply a thin bead of caulk along each seam and smooth it out with your finger or a damp cloth. For nail holes and minor imperfections in the trim itself, use wood filler. Apply a small amount of filler to each hole, let it dry completely, and then sand it smooth. The goal here is to create a flawless surface that's ready for paint.
Sanding is a crucial step that many people skip, but trust me, it makes a huge difference in the final result. Use a fine-grit sandpaper (220-grit or higher) to gently sand all the surfaces of the trim, paying special attention to the areas where you've applied caulk or wood filler. Sanding will smooth out any rough edges or imperfections and create a uniform surface for the paint to adhere to. Wipe away any sanding dust with a tack cloth before moving on to the next step.
- Caulk the Seams: Seal gaps between trim and wall for a seamless look.
- Fill Nail Holes: Use wood filler to hide imperfections.
- Sand Smooth: Create a uniform surface for painting.
- Remove Dust: Wipe down with a tack cloth.
Prime and Paint: The Grand Finale
Now for the moment you've been waiting for – painting! But before you start slathering on the color, it's important to apply a coat of primer. Primer helps the paint adhere better to the trim, provides a uniform base for the color, and prevents any bleed-through from the wood. Choose a high-quality primer that's designed for use on wood trim, and apply it evenly using a brush or roller. Let the primer dry completely before moving on to the paint.
When it comes to choosing a paint color, the sky's the limit! Consider the existing colors in your room and choose a color that complements your overall decor. For a modern, cohesive look, try painting the trim the same color as the wall. Or, for a bolder statement, choose a contrasting color that will really make the accent wall pop. Apply two coats of paint, allowing each coat to dry completely before applying the next. And there you have it – a flawless, professionally finished accent wall that will transform your space!
Step | Description |
|---|---|
Prime | Apply a coat of primer to ensure proper paint adhesion and prevent bleed-through. |
Paint (Coat 1) | Apply the first coat of your chosen paint color evenly. |
Dry | Allow the first coat to dry completely according to the paint manufacturer's instructions. |
Paint (Coat 2) | Apply a second coat of paint for full coverage and rich color. |
Accent Wall Victory: Enjoying Your Stylish New Space
So, you've conquered the accent wall! Give yourself a pat on the back; you've not only boosted your home's style but also leveled up your DIY game. Remember, every project has its bumps, but with a little planning and patience, you can achieve amazing results. Now, stand back, admire your handiwork, and get ready for the compliments to roll in. Your stunning new accent wall is sure to be a conversation starter and a focal point you'll enjoy for years to come.