
Table of Contents
Thinking about adding some serious character to a room? A hardwood accent wall might be just the ticket. It's not just slapping some wood on a wall; it's about creating a focal point that screams style and sophistication. Forget boring, painted walls – we're talking texture, warmth, and a touch of nature indoors. In this article, we're diving deep into the world of hardwood accent walls. We'll explore why they're such a popular choice, from boosting your home's value to adding a unique design element. Get ready to be inspired with a range of creative ideas, whether you're into rustic chic or modern minimalism. We'll break down the pros and cons of DIY versus professional installation, giving you the knowledge to make the best decision for your project. Plus, we'll share essential tips on how to keep your hardwood accent wall looking its best for years to come. So, grab a coffee, and let's transform your space, one plank at a time.
Why Choose a Hardwood Accent Wall? Benefits and Considerations
Why Choose a Hardwood Accent Wall? Benefits and Considerations
Aesthetic Appeal and Design Versatility
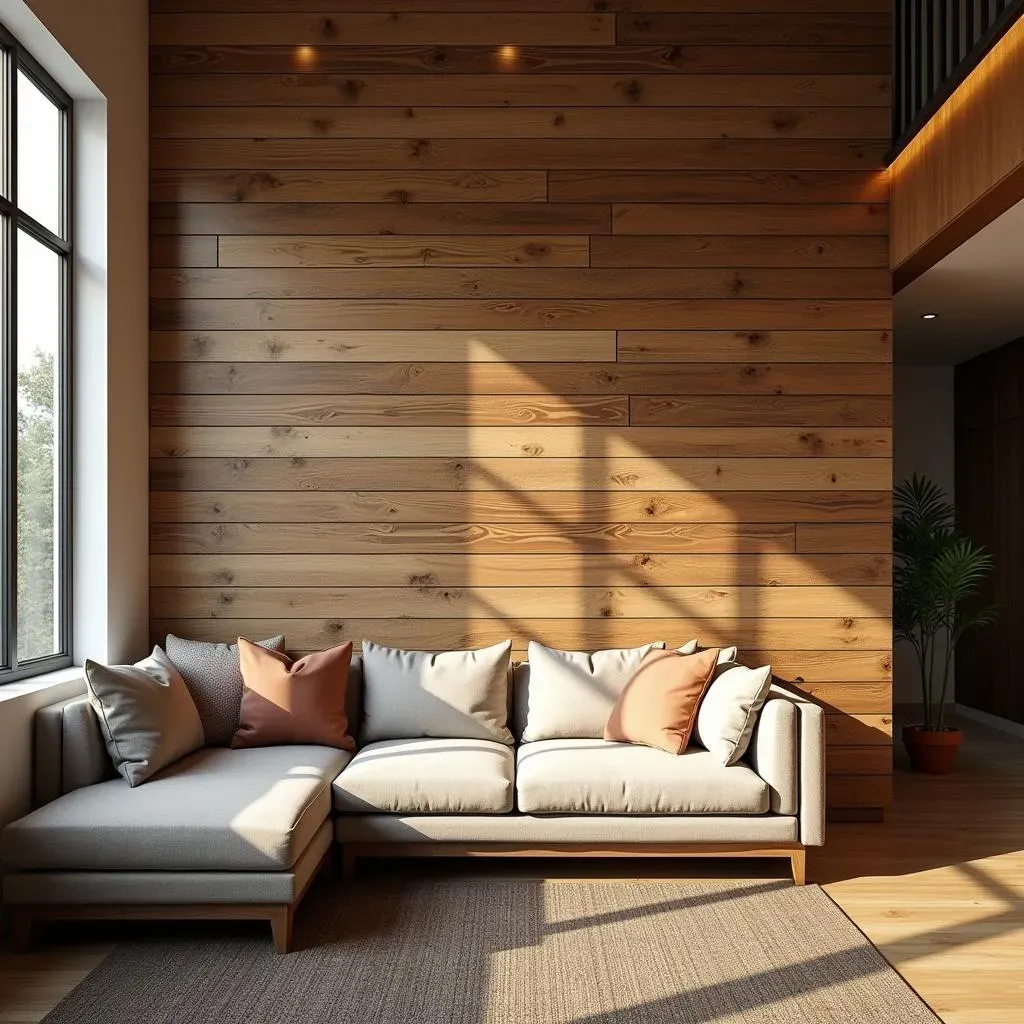
Let's face it, a plain painted wall is, well, just a wall. A hardwood accent wall, on the other hand, is a statement. It's an instant upgrade that adds texture, depth, and visual interest to any room. Whether you're aiming for a rustic farmhouse vibe, a sleek modern look, or something in between, hardwood is incredibly versatile. You can choose from a wide range of wood species, colors, and plank styles to perfectly match your existing decor or create a stunning contrast.
Think about it: a dark walnut wall in a minimalist living room, or a light-toned reclaimed wood wall in a cozy bedroom. The possibilities are endless! And it's not just about looks. The natural warmth of wood can make a room feel more inviting and comfortable, creating a space you actually want to spend time in. Plus, it's a great way to showcase your personal style and add a unique touch to your home.
"A hardwood accent wall can transform a room from drab to fab in a weekend!"
Adding Value and Insulation
Beyond the visual benefits, a hardwood accent wall can actually increase the value of your home. It's seen as a premium upgrade that sets your property apart from the competition. Potential buyers will appreciate the attention to detail and the stylish touch that a hardwood wall provides. It shows that you've invested in quality materials and design, which can translate into a higher selling price.
And here's a bonus: hardwood also offers some level of insulation. While it's not going to replace proper wall insulation, it can help to regulate temperature and reduce noise. This is especially beneficial in older homes or apartments with thin walls. So, you're not just getting a beautiful wall, you're also getting a more comfortable and energy-efficient living space. It's a win-win!
Benefit | Description |
|---|---|
Aesthetic Appeal | Adds texture, depth, and visual interest to a room. |
Design Versatility | Available in various wood species, colors, and styles. |
Increased Home Value | Considered a premium upgrade that can attract buyers. |
Insulation | Helps regulate temperature and reduce noise. |
Creative Hardwood Accent Wall Ideas for Every Style
Creative Hardwood Accent Wall Ideas for Every Style
Reclaimed Wood: Rustic Charm
let's get into the fun stuff – the actual design ideas! First up, we have reclaimed wood. This is where you can really embrace that rustic, farmhouse aesthetic. Think weathered planks, knots, and imperfections – all the things that tell a story. Reclaimed wood brings a sense of history and character to a room that you just can't get with new materials. You can source reclaimed wood from old barns, factories, or even salvage yards. Each piece is unique, so your wall will be a one-of-a-kind masterpiece. It's perfect for creating a cozy and inviting atmosphere in living rooms, bedrooms, or even home offices.
Now, you don't have to go full-on rustic. You can also use reclaimed wood in more modern settings. The key is to choose planks with cleaner lines and a more uniform color palette. This will give you a touch of that reclaimed charm without sacrificing the sleekness of a contemporary design. For example, a reclaimed wood wall behind a modern sofa can create a stunning contrast that adds depth and interest to the space.
Geometric Patterns: Modern Edge
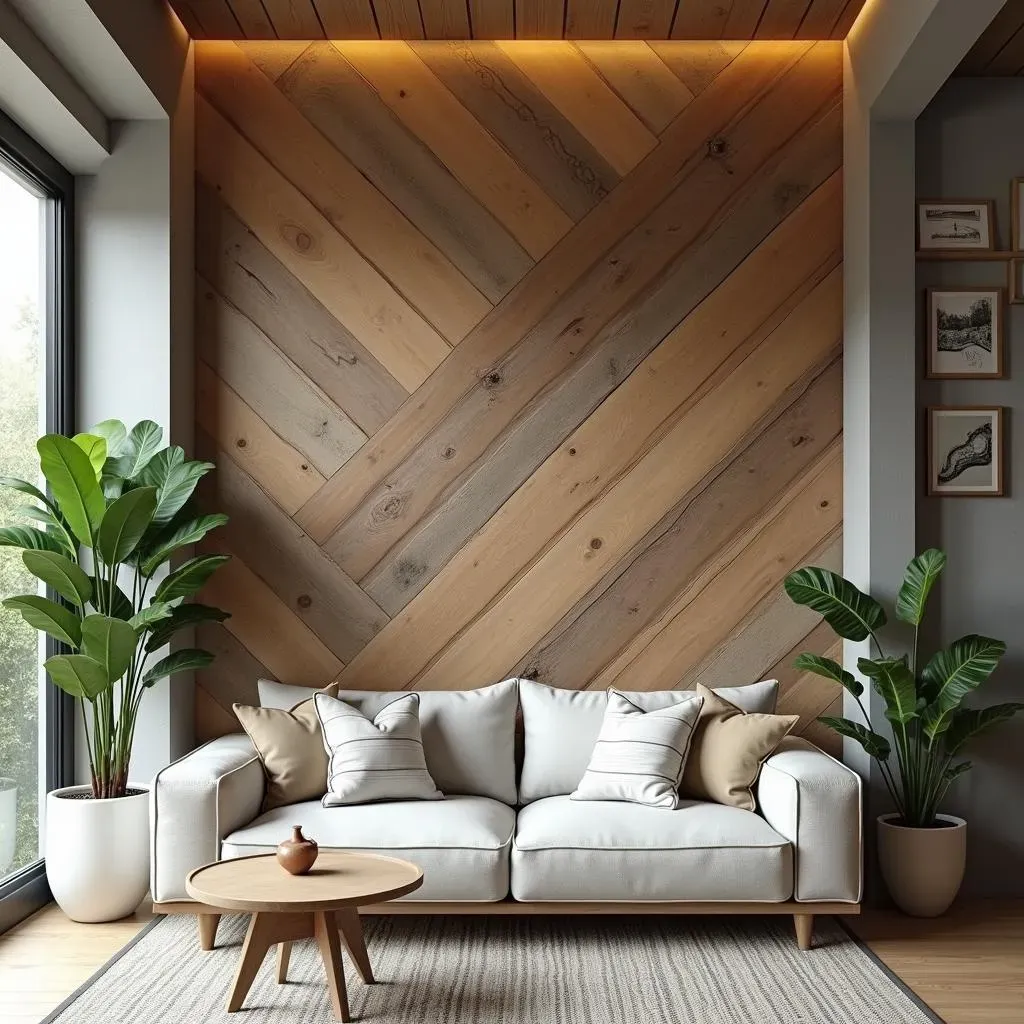
If rustic isn't your thing, how about something more modern and geometric? This is where you can get really creative with different shapes, sizes, and angles. Think chevrons, herringbone patterns, or even more abstract designs. The key is to plan it out carefully and use precise cuts to create a clean and polished look. Geometric patterns are perfect for adding a touch of sophistication and visual interest to any room. They work especially well in minimalist or contemporary spaces, where the clean lines and sharp angles can really shine.
You can also play with different wood species and finishes to create even more dramatic effects. For example, using a combination of light and dark woods in a chevron pattern can create a striking visual contrast. Or, you can use a glossy finish to highlight the geometric shapes and add a touch of glamour. The possibilities are endless, so don't be afraid to experiment and find a design that truly reflects your personal style.
Style | Description | Best For |
|---|---|---|
Reclaimed Wood | Rustic, weathered planks with knots and imperfections. | Farmhouse, cozy, or eclectic spaces. |
Geometric Patterns | Chevrons, herringbone, or abstract designs with clean lines. | Modern, minimalist, or contemporary spaces. |
DIY vs. Professional Installation: Hardwood Accent Wall Guide
DIY vs. Professional Installation: Hardwood Accent Wall Guide
Assessing Your Skills and Tools
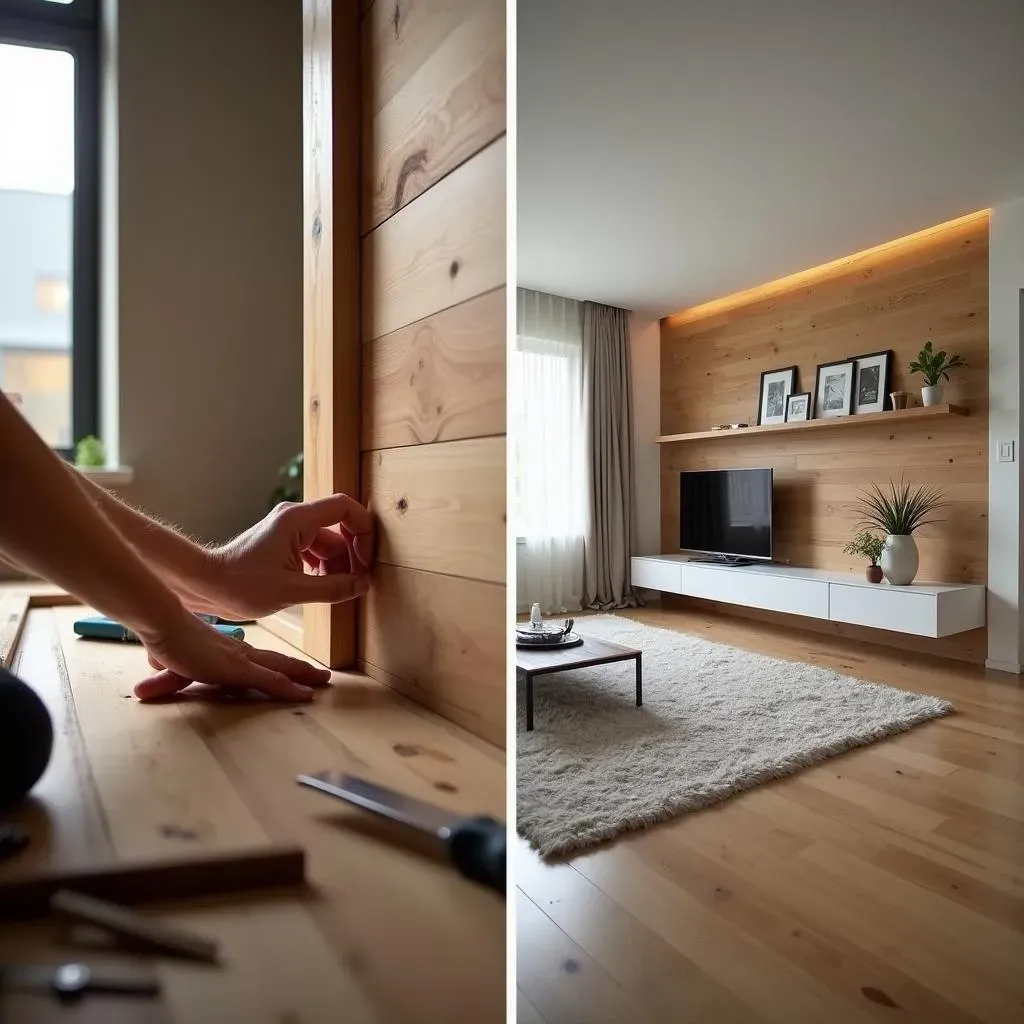
so you're fired up about your hardwood accent wall. Awesome! But before you start swinging a hammer, let's get real about your DIY skills. Have you tackled similar projects before? Are you comfortable with power tools like saws and nail guns? Do you have a good eye for detail and patience for precision work? If you're nodding your head yes to all of these, then DIY might be a great option for you. You'll save money on labor costs and get the satisfaction of creating something yourself. However, if you're a newbie when it comes to home improvement, or if you're short on time and patience, then hiring a professional might be the smarter move.
Besides skills, you also need to consider the tools. Installing a hardwood accent wall requires more than just a hammer and nails. You'll likely need a saw (circular or miter), a nail gun, a level, a measuring tape, a stud finder, and safety gear like eye protection and gloves. If you don't already own these tools, you'll need to factor in the cost of renting or buying them. And don't forget about the little things like sandpaper, wood filler, and caulk. These can make a big difference in the final result.
Cost Comparison: DIY vs. Professional
Let's talk money. DIY is almost always cheaper upfront, but it's not always the best value. When you DIY, your main costs are materials (the wood itself, nails, adhesive, etc.) and tool rentals or purchases. The big savings come from skipping labor costs, which can be a significant chunk of a professional's fee. However, DIY can end up costing more if you make mistakes that require redoing parts of the wall or if you have to buy specialized tools you'll only use once. Plus, don't forget to factor in your time. Time is money, after all!
Professional installation, on the other hand, comes with a higher initial price tag. You're paying for the installer's expertise, labor, and potentially their tools (though some may still charge you for certain materials). However, you're also paying for peace of mind. A professional will ensure the job is done correctly, efficiently, and with a high level of finish. They'll also handle any unexpected issues that might arise, saving you time, stress, and potential headaches. Get quotes from multiple installers to compare prices and services, and make sure they're licensed and insured. It's an investment in quality and a worry-free experience.
Factor | DIY | Professional Installation |
|---|---|---|
Initial Cost | Lower | Higher |
Labor | Your own (free, but time-consuming) | Included in price |
Tools | Rental or purchase required | Usually included |
Risk of Errors | Higher (potential for mistakes and rework) | Lower (expertise ensures quality) |
Time Commitment | Significant | Minimal |
Potential Pitfalls and How to Avoid Them
Whether you go the DIY route or hire a pro, there are potential pitfalls to watch out for. With DIY, common mistakes include uneven plank placement, incorrect measurements, and using the wrong type of adhesive or fasteners. To avoid these, take your time, double-check your measurements, and research the best materials for your specific type of wood and wall surface. Watch online tutorials and don't be afraid to ask for advice from experienced DIYers or hardware store employees. And most importantly, don't rush the process. A well-planned and carefully executed DIY project will always look better than a rushed and sloppy one.
If you're hiring a professional, the biggest pitfall is choosing the wrong contractor. To avoid this, do your research, read online reviews, and ask for references. Make sure the contractor is licensed and insured, and get a detailed written estimate before work begins. Don't be afraid to ask questions and express your concerns. A good contractor will be happy to address your questions and work with you to ensure you're happy with the final result. And remember, the cheapest option isn't always the best. It's better to pay a little more for a qualified and reputable contractor than to save money on a shoddy job that you'll regret later.
Maintaining Your Hardwood Accent Wall: Tips and Tricks
Maintaining Your Hardwood Accent Wall: Tips and Tricks
Regular Cleaning: Dusting and Wiping
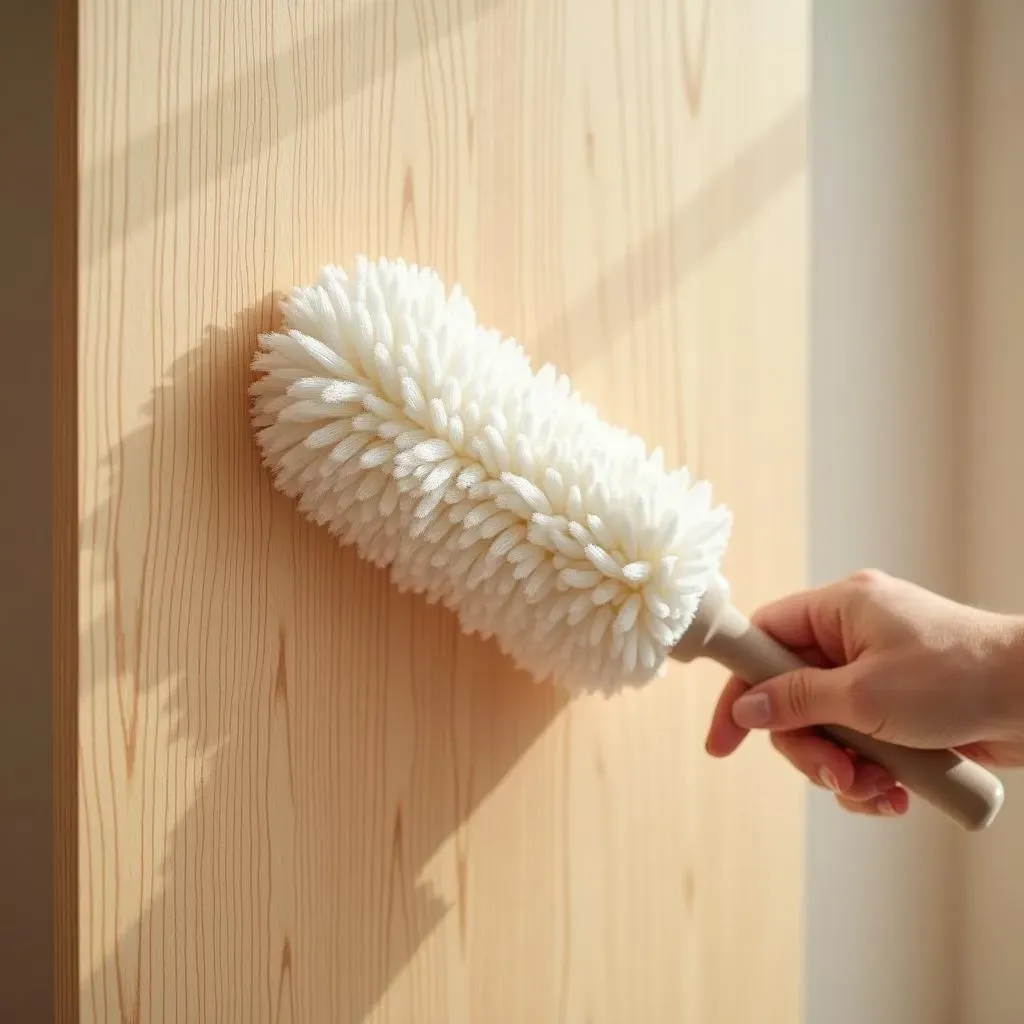
Alright, you've got this gorgeous hardwood accent wall, and now you want to keep it looking its best. The good news is, it's not rocket science! Regular cleaning is key. Think of it like dusting your furniture – it's a simple habit that makes a big difference. Use a soft, dry cloth or a microfiber duster to gently remove dust and cobwebs from the surface of the wood. Do this at least once a week, or more often if you live in a dusty area. This prevents dust from building up and becoming harder to remove later on. For deeper cleaning, you can use a slightly damp cloth, but make sure it's not soaking wet. You don't want to saturate the wood, as this can cause it to warp or stain. Always follow the grain of the wood when wiping, and dry the surface immediately with a clean, dry cloth.
Avoid using harsh chemicals or abrasive cleaners on your hardwood accent wall. These can damage the finish and dull the wood over time. Stick to gentle, wood-friendly cleaning products. You can even make your own cleaner by mixing a few drops of dish soap with warm water. Always test any cleaning product on an inconspicuous area of the wall first to make sure it doesn't cause any discoloration or damage. And remember, less is more! A little bit of gentle cleaning goes a long way in keeping your hardwood wall looking beautiful for years to come.
Addressing Scratches and Damage
Life happens, and sometimes your hardwood accent wall might get a scratch or a ding. Don't panic! Minor scratches can often be buffed out with a soft cloth and a little bit of furniture polish. For deeper scratches, you can use a wood touch-up marker or crayon that matches the color of your wood. Simply fill in the scratch with the marker or crayon, and then wipe away any excess with a clean cloth. You can also use wood filler to repair larger dents or holes. Apply the filler to the damaged area, let it dry completely, and then sand it smooth. Finally, stain or paint the filled area to match the rest of the wall.
Preventive measures are always the best approach. Consider using felt pads on the backs of furniture that sits close to the wall to prevent scratches. Also, be careful when moving furniture around the room to avoid bumping into the wall. If you have pets, keep their nails trimmed to minimize the risk of scratches. And if you have kids, well, good luck! Just kidding (sort of). Teach them to be gentle around the wall and avoid throwing things at it. With a little bit of care and attention, you can keep your hardwood accent wall looking pristine for years to come.
Issue | Solution | Prevention |
|---|---|---|
Dust Buildup | Regular dusting with a soft cloth or microfiber duster. | Dust weekly or more often in dusty areas. |
Minor Scratches | Buff with a soft cloth and furniture polish. | Use felt pads on furniture, be careful when moving items. |
Deeper Scratches | Wood touch-up marker or crayon. | Keep pet nails trimmed. |
Dents or Holes | Wood filler, sanding, and staining/painting. | Teach kids to be gentle around the wall. |
The Enduring Appeal of the Hardwood Accent Wall
From rustic charm to modern elegance, the hardwood accent wall stands as a versatile design choice. It's more than just a wall; it's a statement, a reflection of your personal style, and a surefire way to elevate any space. Whether you opt for a DIY adventure or enlist the expertise of professionals, the key is to embrace the process and create a feature that you'll love for years to come. So go ahead, unleash your creativity, and let the warmth and beauty of wood transform your home.