Table of Contents
Is your kitchen feeling a little, well, blah? You know, like it’s missing that certain *je ne sais quoi*? Maybe it's time to ditch the plain walls and embrace the power of pattern! I'm talking about accent wallpaper kitchen transformations that can take your cooking space from drab to fab. Think of it – a pop of color, a touch of texture, a whole new vibe, all thanks to some strategically placed wallpaper. This isn’t your grandma’s floral wallpaper (unless that's your thing, then rock it!). We're talking modern designs, bold patterns, and styles that scream "you." In this article, we'll explore why accent wallpaper is a game-changer for kitchens, how to find a style that perfectly matches your taste, and finally, the nitty-gritty details on getting it up on your walls, and keeping it looking great. Ready to transform your kitchen into the heart of your home? Let's jump in!
Why Choose Accent Wallpaper for Your Kitchen?
Why Choose Accent Wallpaper for Your Kitchen?
Beyond the Paint: Adding Personality
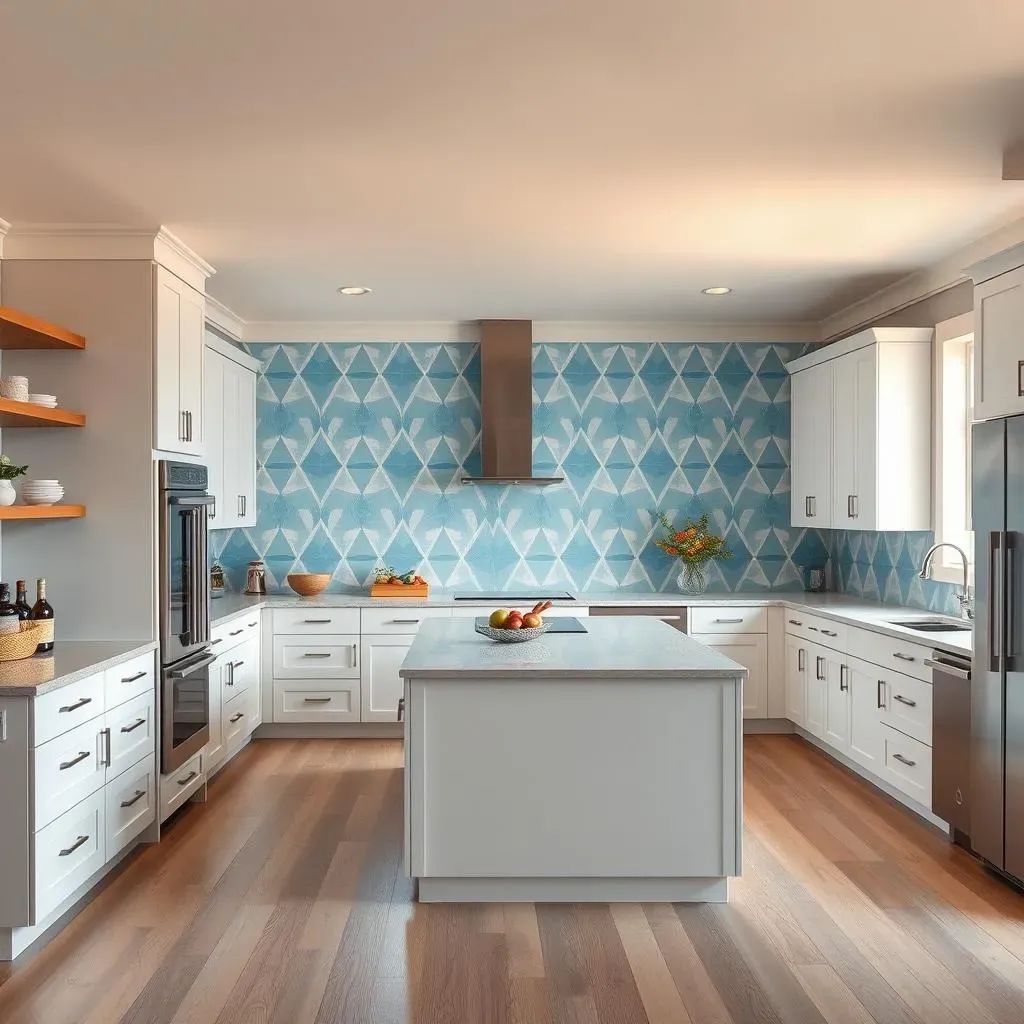
Let's face it, paint is great, but it can sometimes feel a little...flat. It's like wearing a plain white t-shirt every day. Functional, sure, but not exactly exciting. Accent wallpaper, on the other hand, is like throwing on a statement jacket. It injects personality, depth, and a whole lot of visual interest into your kitchen. Think about it: you can instantly create a focal point, define a specific area, or even make a small kitchen feel bigger with the right pattern. It's about more than just color; it's about texture, design, and adding that "wow" factor.
I remember when I first moved into my place, the kitchen was just…beige. Everything. The walls, the cabinets, it was like living inside a sandcastle. Adding a bold geometric wallpaper to one wall completely changed the game. Suddenly, it wasn't just a place to cook; it was a space with character. It felt like me, and that's the power of an accent wall. It’s about making your kitchen feel like yours.
Practical Magic: Hiding Imperfections
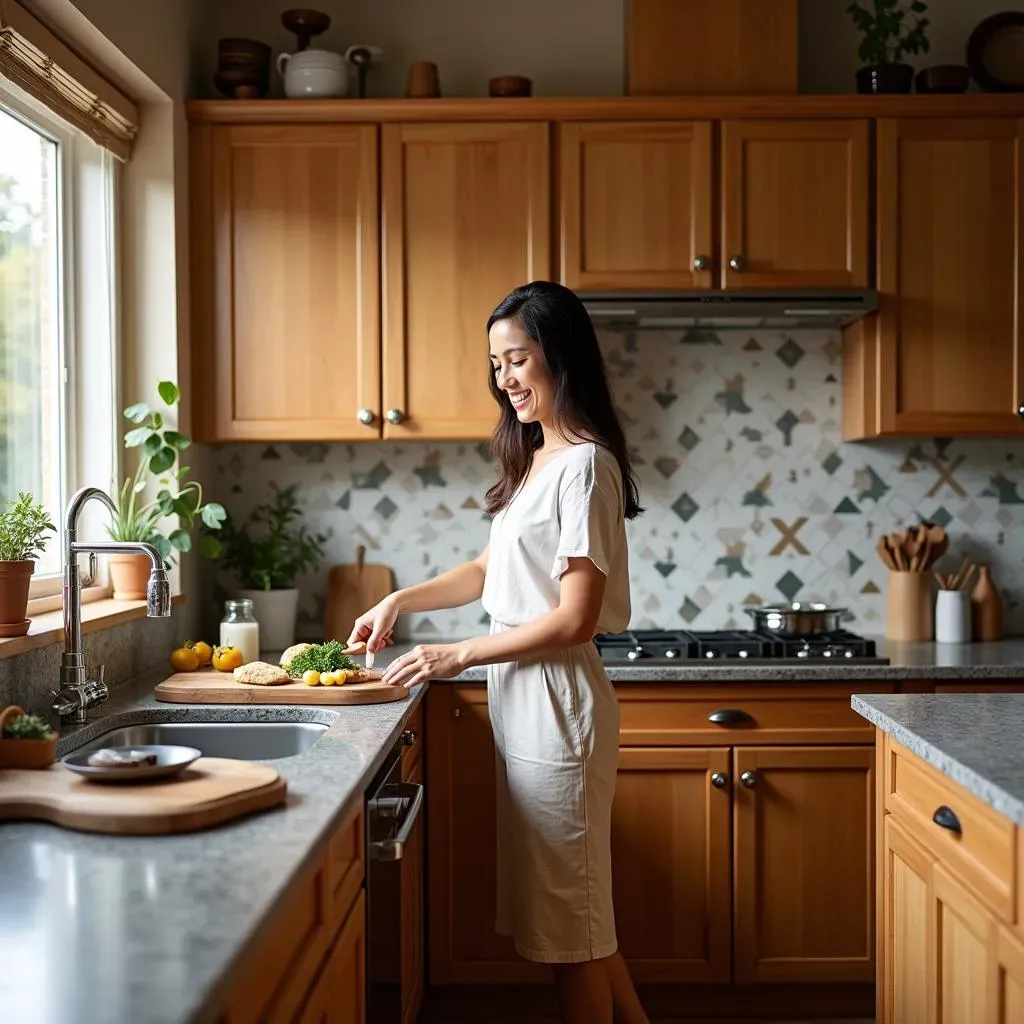
let's be real, kitchens aren't always the most pristine places. Between cooking splatters, the occasional bumped wall, and the general wear and tear of daily life, things can get a little rough. Accent wallpaper isn't just about pretty patterns; it's also a surprisingly practical solution. A textured wallpaper can hide minor imperfections, like small dents or uneven surfaces, much better than a coat of paint ever could. It's like a secret weapon for a flawless looking kitchen.
Plus, some wallpapers are designed to be super durable and easy to clean. Forget scrubbing endlessly at stubborn stains; a quick wipe with a damp cloth is often all it takes to keep your accent wall looking its best. This is huge for a space that's prone to messes. I had a friend who accidentally spilled marinara sauce on her wallpaper, and a simple wipe cleaned it up like nothing ever happened. That’s the kind of low-maintenance magic we all need in our busy lives.
Benefit | Details |
|---|---|
Personalization | Adds character and reflects your style. |
Visual Interest | Creates focal points and depth. |
Hides Imperfections | Textured wallpaper conceals flaws. |
Easy Maintenance | Many wallpapers are durable and easy to clean. |
Finding the Perfect Accent Wallpaper Kitchen Style
Finding the Perfect Accent Wallpaper Kitchen Style
Navigating the Pattern Jungle
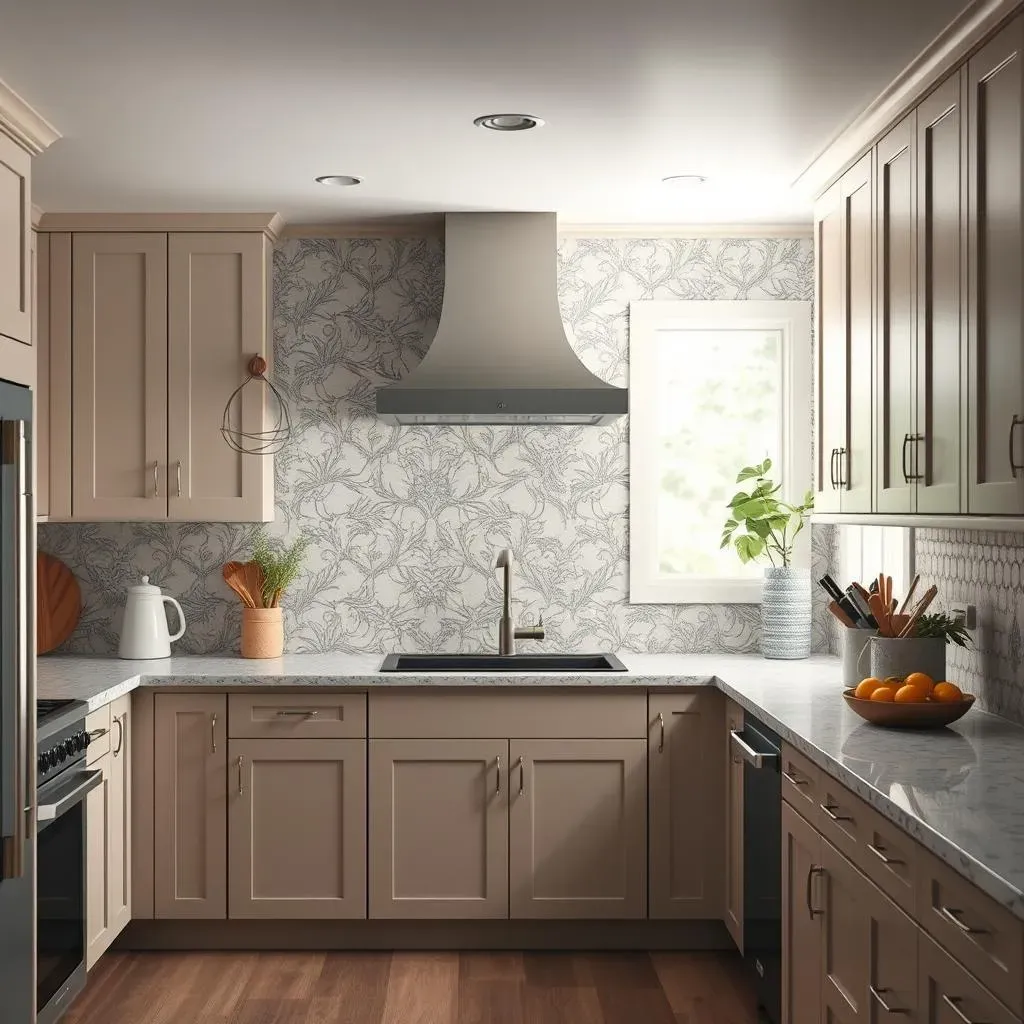
so you're sold on accent wallpaper for your kitchen, but where do you even begin? It can feel like stepping into a jungle of patterns, colors, and textures. Don't panic! The key is to think about the overall vibe you want to create. Are you going for a cozy, farmhouse feel? Maybe a bold, modern statement? Or perhaps something more classic and timeless? Different patterns will evoke different feelings. Geometric patterns can feel very contemporary, while floral designs can add a touch of romance. Don't be afraid to experiment with samples and see what resonates with you and your kitchen's overall style.
I once helped a friend pick out wallpaper for her kitchen, and she was totally overwhelmed. She had pinned about a million different images, and they were all over the place. We ended up going through them together, and we realized that she was drawn to nature-inspired patterns. We found a gorgeous botanical print that perfectly matched her personality and her kitchen. It was a total game-changer, and it taught me the importance of looking for common threads in your inspiration.
Considering Color and Scale
Once you have a general idea of the pattern style you're after, it’s time to think about color and scale. Color can dramatically impact the mood of your kitchen. Light colors can make a small space feel larger and brighter, while dark colors can add drama and coziness. Consider the existing colors in your kitchen – your cabinets, countertops, and appliances – and choose a wallpaper that complements them. You want harmony, not chaos. Scale matters too. Large-scale patterns can be bold and eye-catching, but they might overwhelm a small kitchen. Smaller patterns tend to be more versatile and easier to live with.
I learned this the hard way. I once chose a wallpaper with huge, vibrant flowers for a small powder room. It was fun, but it felt like the flowers were taking over the entire space. It was way too much, way too fast. I ended up swapping it for a smaller, more subtle pattern, and it made a world of difference. Sometimes, less really is more, especially when it comes to smaller spaces.
Material Matters: Choosing the Right Wallpaper
Finally, let's talk about materials. Not all wallpapers are created equal, especially for a kitchen. You need something that's durable, washable, and can withstand the occasional splatter. Vinyl wallpaper is a great option because it's super easy to clean. It's also more resistant to moisture, which is crucial in a kitchen environment. Paper wallpapers might look gorgeous, but they're not always the most practical choice for a space that's prone to messes.
Also, think about the texture of the wallpaper. A textured wallpaper can add depth and visual interest, but it might also be harder to clean. If you're unsure, order samples and test them out. Spill some water, try to wipe them down, and see how they hold up. It’s a small step that can save you a lot of headaches down the road. I've always said, a little prep goes a long way, especially when it comes to wallpaper.
Style Factor | Consideration |
|---|---|
Pattern | Geometric, floral, abstract, etc. |
Color | Light, dark, complementary to existing elements. |
Scale | Large or small, depending on space. |
Material | Vinyl, paper, textured, etc. |
Durability | Washable and resistant to moisture. |
How to Install and Maintain Your Kitchen Accent Wallpaper
How to Install and Maintain Your Kitchen Accent Wallpaper
Prep Work is Key: Getting Started
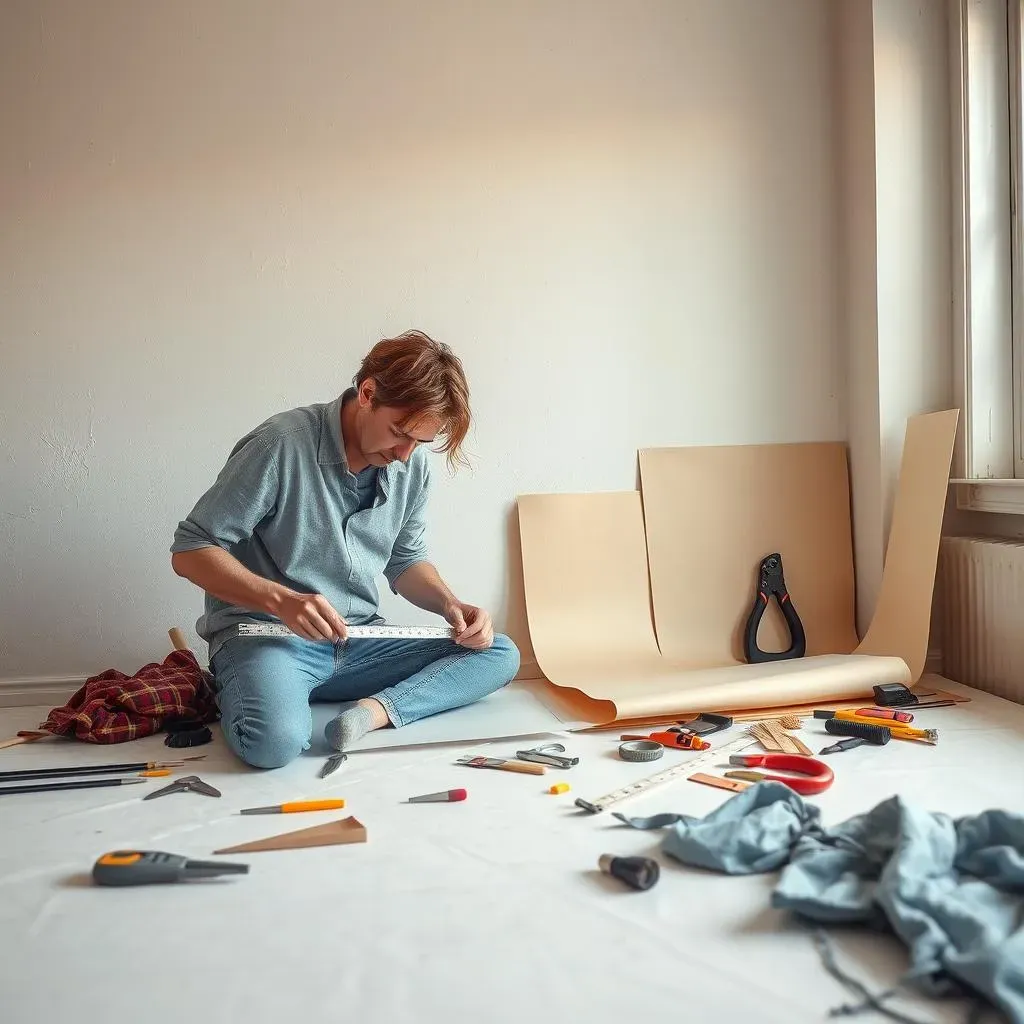
Alright, so you've picked out the perfect accent wallpaper, now the real fun begins, which is putting it up. Before you even think about grabbing the paste, you've got to prep your walls. This isn’t a step you want to skip. Think of it like prepping a canvas before painting. You need a smooth, clean surface for the wallpaper to adhere to properly. Start by cleaning your walls with a damp cloth to remove any dust or grime. If you have any holes or cracks, fill them with spackle and sand them down. This will prevent any imperfections from showing through your wallpaper. Trust me, a little prep work goes a long way to achieving a professional-looking finish. I once tried to wallpaper over a slightly uneven wall, and it was a disaster. The bumps were visible, and it just looked messy. Lesson learned: always prep your walls!
Next, gather your tools. You’ll need a measuring tape, a level, a pencil, a smoothing tool (like a plastic smoother or a clean cloth), a sharp utility knife or scissors, a wallpaper paste or adhesive (if using non-pasted wallpaper), a bucket, and a sponge. Having everything at hand will make the process much smoother and less stressful. It’s like setting up your station before starting a cooking recipe – you want to have everything you need readily available. And if you're using a paste, be sure to mix it according to the manufacturer's instructions. Too much water, and it won't stick; too little, and it'll be a gloopy mess. It's all about finding that perfect balance.
Hanging Like a Pro: Step-by-Step Guide
Now for the actual hanging process. Start by measuring your wall and cutting your wallpaper into strips, making sure to add a few extra inches at the top and bottom for trimming. If you're using non-pasted wallpaper, apply the paste to the back of the wallpaper strip, making sure to cover all areas evenly. If you're using pre-pasted wallpaper, you'll need to activate the paste by dipping the strip in water for the recommended time. Once the paste is ready, carefully align the first strip of wallpaper with the top corner of your wall, using a level to ensure it's perfectly straight. Then, smooth it down from the center outwards, using your smoothing tool to remove any air bubbles. Be gentle, but firm, and avoid stretching the wallpaper. It’s like applying a screen protector to your phone, you want to get it just right.
As you hang each strip, make sure to match the pattern carefully. This is where patience comes in handy. Some patterns are easier to match than others, so take your time. Once you have all your strips up, use a sharp utility knife or scissors to trim off any excess wallpaper at the top and bottom. Wipe away any excess paste with a damp sponge, and step back to admire your work. It might not be perfect the first time, but with practice, you’ll get the hang of it. And if you do make a mistake, don't sweat it. Wallpaper is pretty forgiving, and you can always peel it off and try again if needed. Just remember, it’s all part of the learning process.
Step | Action |
|---|---|
1 | Clean and prep walls. |
2 | Gather tools and materials. |
3 | Cut wallpaper into strips. |
4 | Apply paste (if needed). |
5 | Hang and smooth wallpaper. |
6 | Match patterns and trim excess. |
Keeping it Fresh: Maintenance Tips
Once your accent wallpaper is up, you want to keep it looking its best. Luckily, maintaining wallpaper is usually pretty straightforward. For most wallpapers, a regular wipe-down with a damp cloth is all you need to remove dust and dirt. For tougher stains, you can try using a mild soap solution, but always test it in an inconspicuous area first to make sure it doesn't damage the wallpaper. Avoid using harsh chemicals or abrasive cleaners, as they can fade the colors or damage the surface. It’s like caring for your favorite clothes, you want to treat them gently.
Also, be mindful of the location of your wallpaper. If it’s near the stove, it might be exposed to more grease and splatters. Consider using a backsplash or a piece of glass to protect it in these areas. And if you notice any seams starting to lift, you can use a wallpaper seam adhesive to fix them quickly. A little bit of regular maintenance can make a big difference in how long your wallpaper lasts and how good it looks. I once had a wallpaper that lasted over ten years because I took the time to care for it properly. It’s about being proactive and addressing any issues before they become bigger problems.
Wrapping Up Your Kitchen Wallpaper Adventure
So, we've journeyed through the world of accent wallpaper kitchens. From understanding why it's such a cool design choice, to picking the perfect style, and even tackling the installation process, you're now armed with all the knowledge you need to make your kitchen pop. Remember, it's about injecting your personality into the space where you probably spend a lot of your time. Don't be afraid to go bold, experiment with patterns, and create a kitchen that's as unique as you are. Now go forth, grab that wallpaper, and get ready to enjoy your newly transformed kitchen!